New article
Recently updated
Configuring a chemical testing profile

Who is this article for?
Administrators who want to learn to configure a chemical testing profile.
Administrator permissions are required.
This tutorial covers managing chemical testing profiles, including updating test frequencies, reviewing testing history, and submitting test results.
You will learn how to navigate the Data Manager, configure chemical profiles, set test frequencies, and manage test submissions.
1. Configuring chemical testing profiles
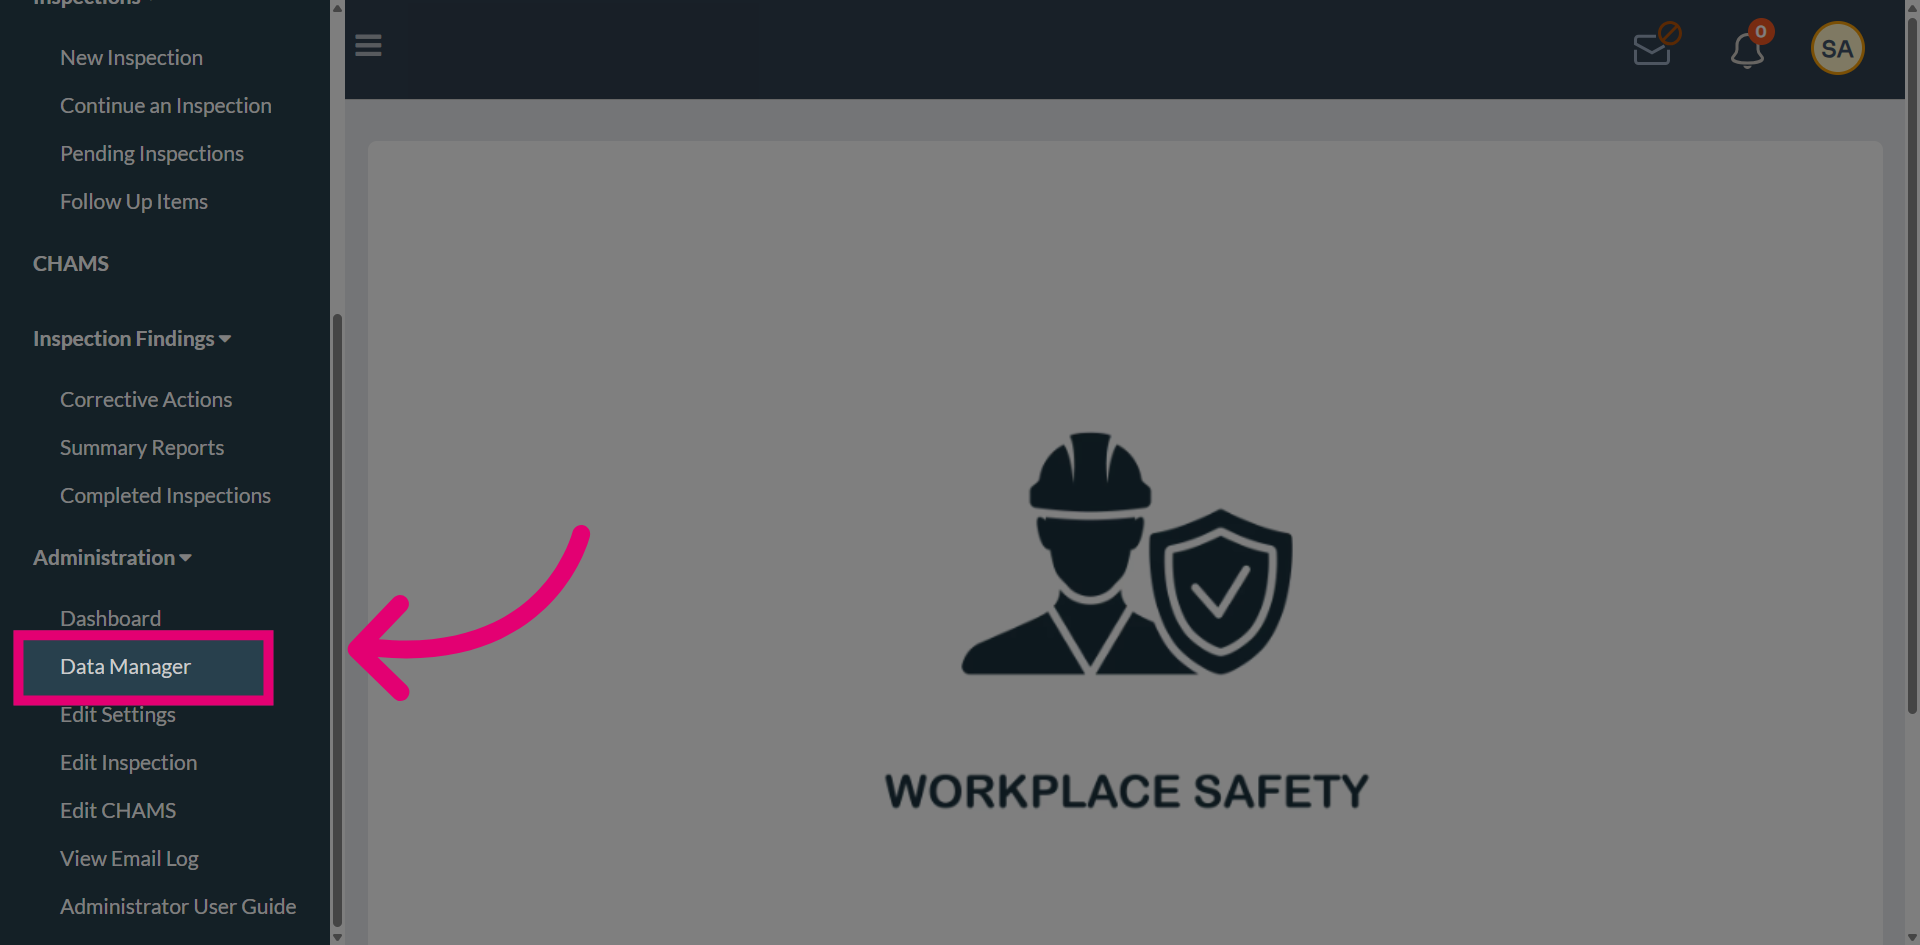
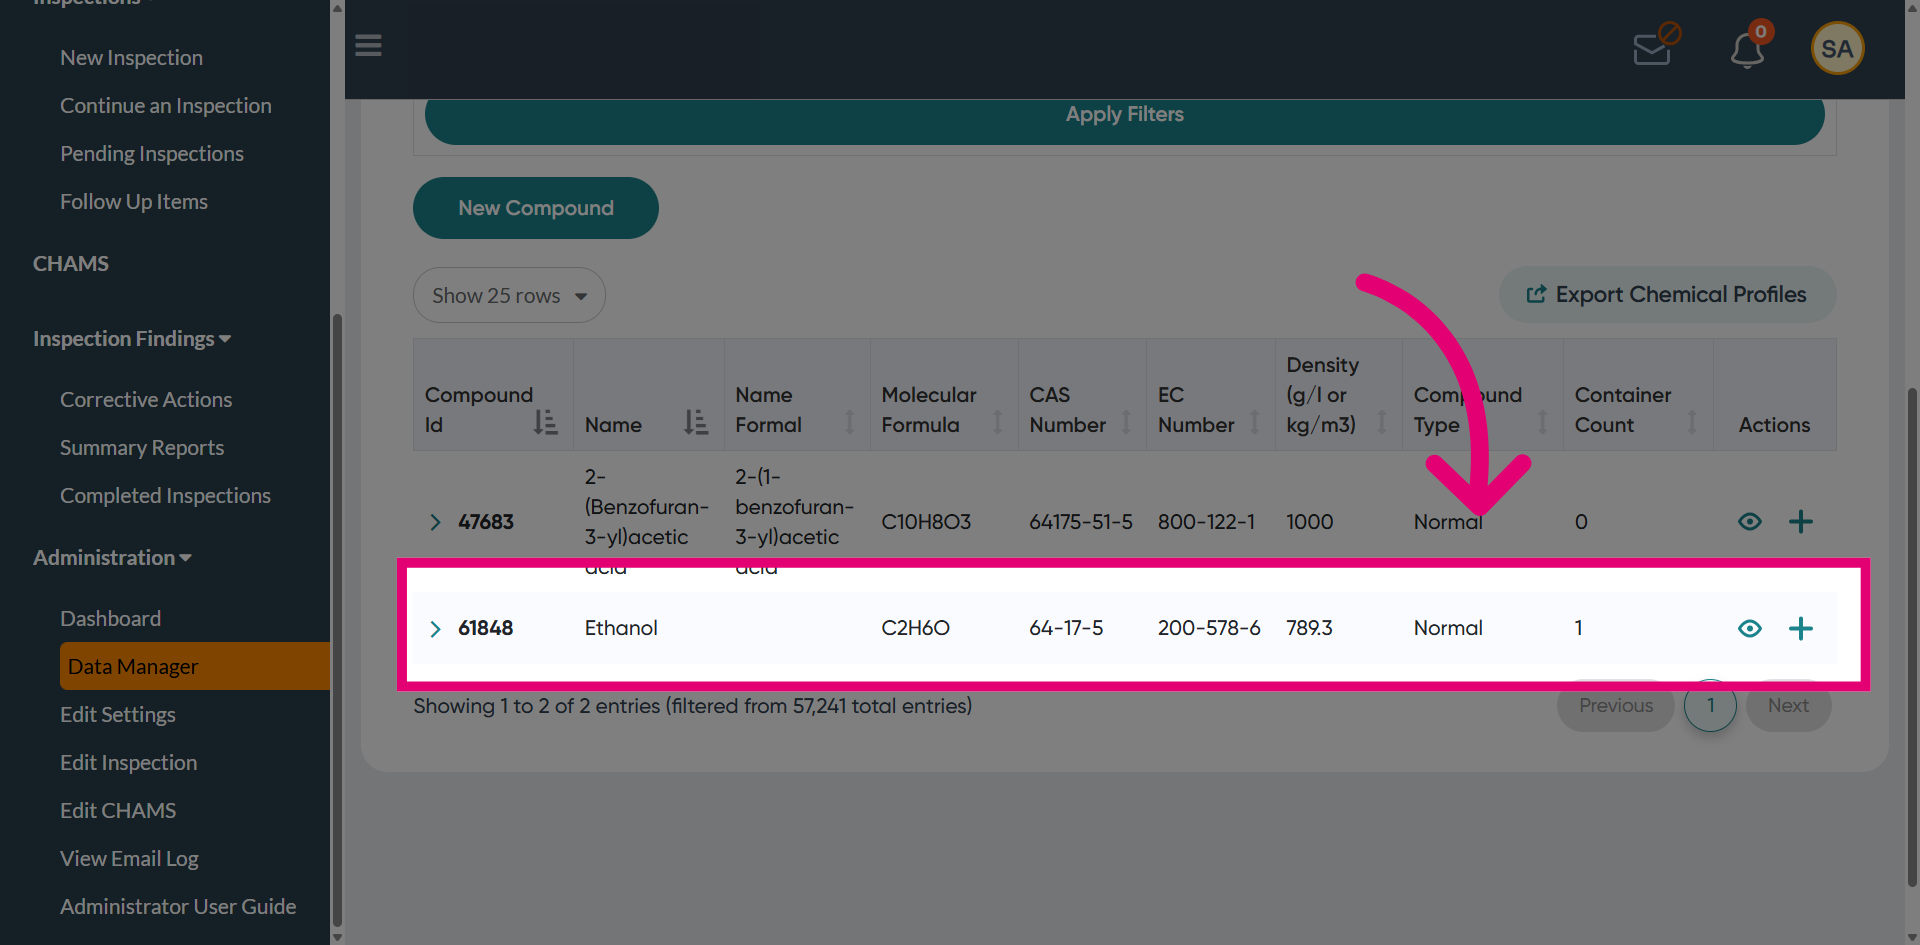
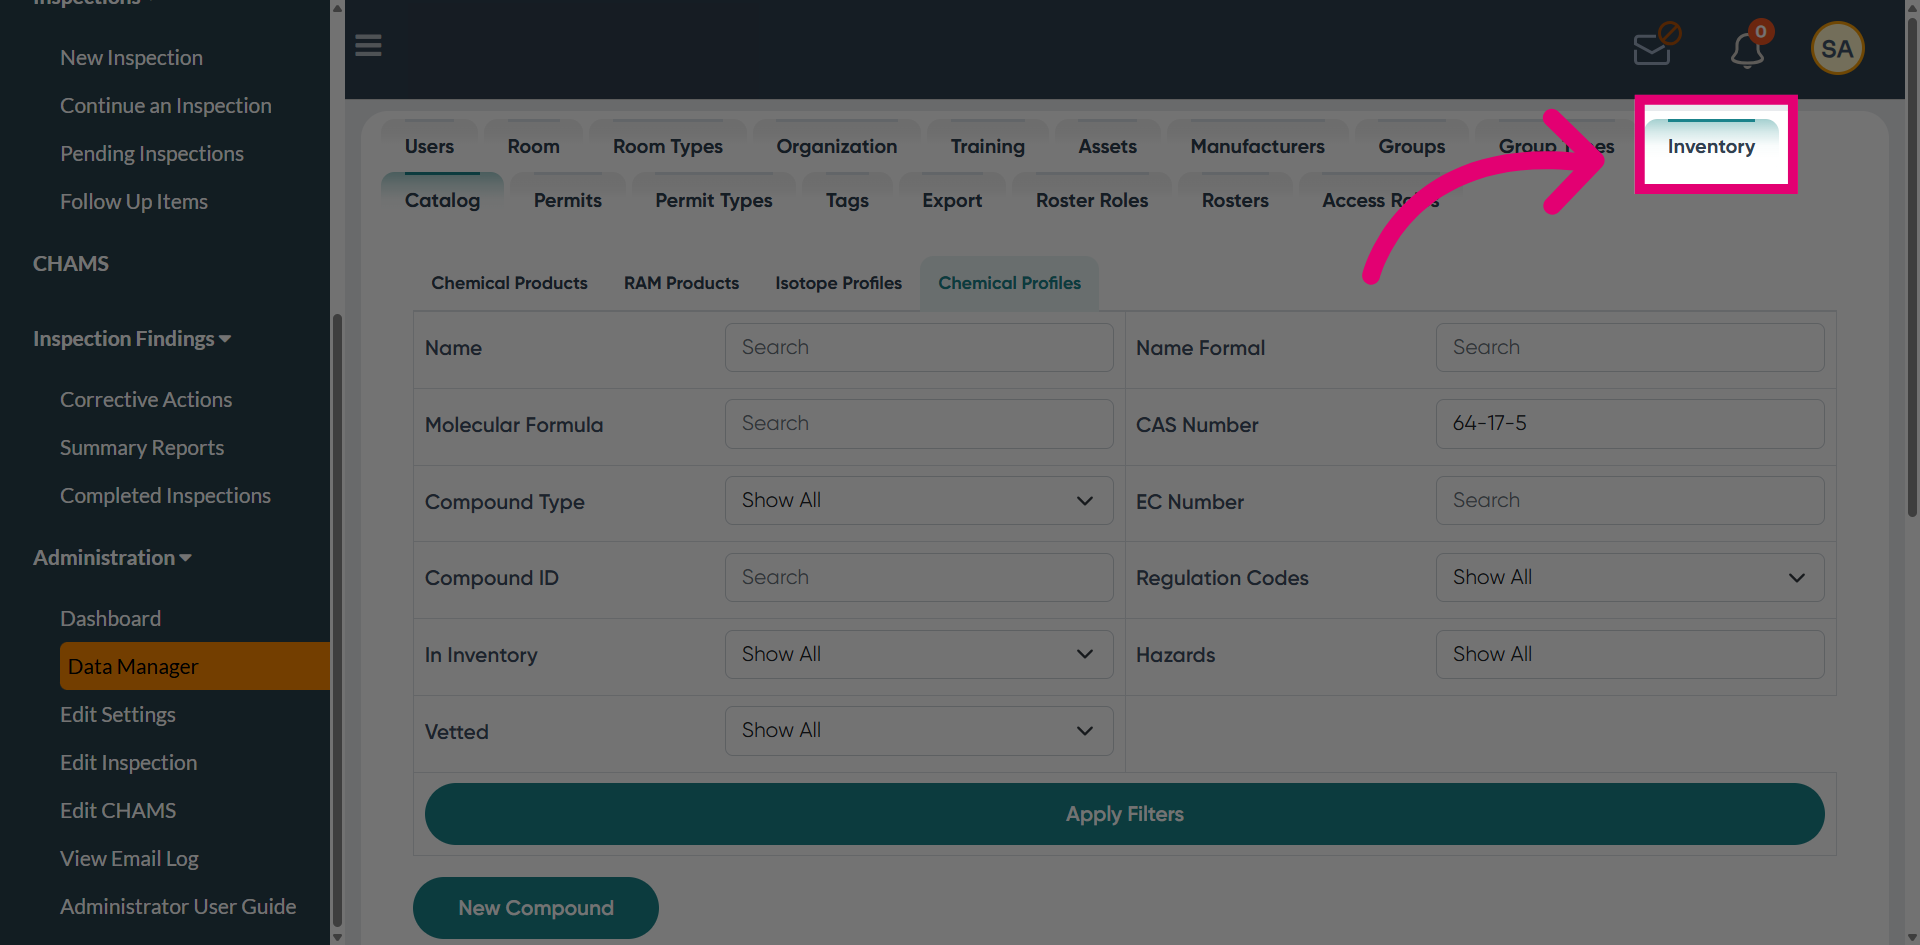
Navigate to Data Manager to access chemical data management.
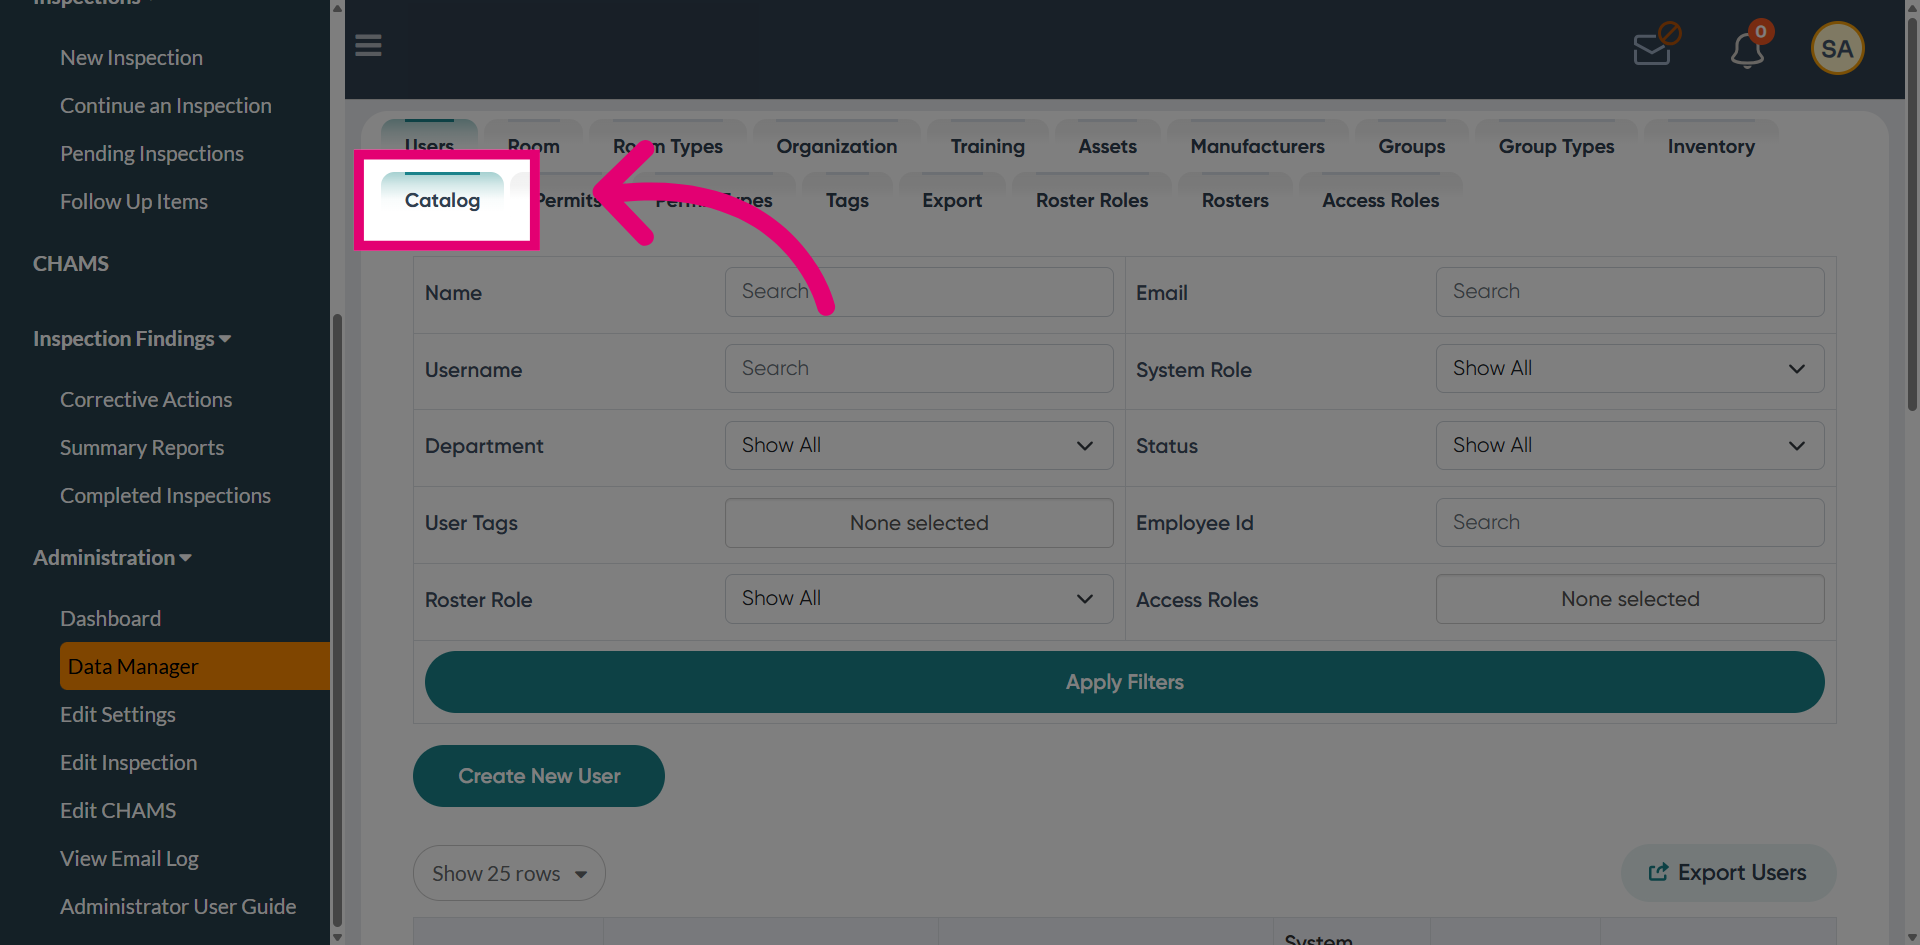
Open the Catalog section to view organized chemical data.
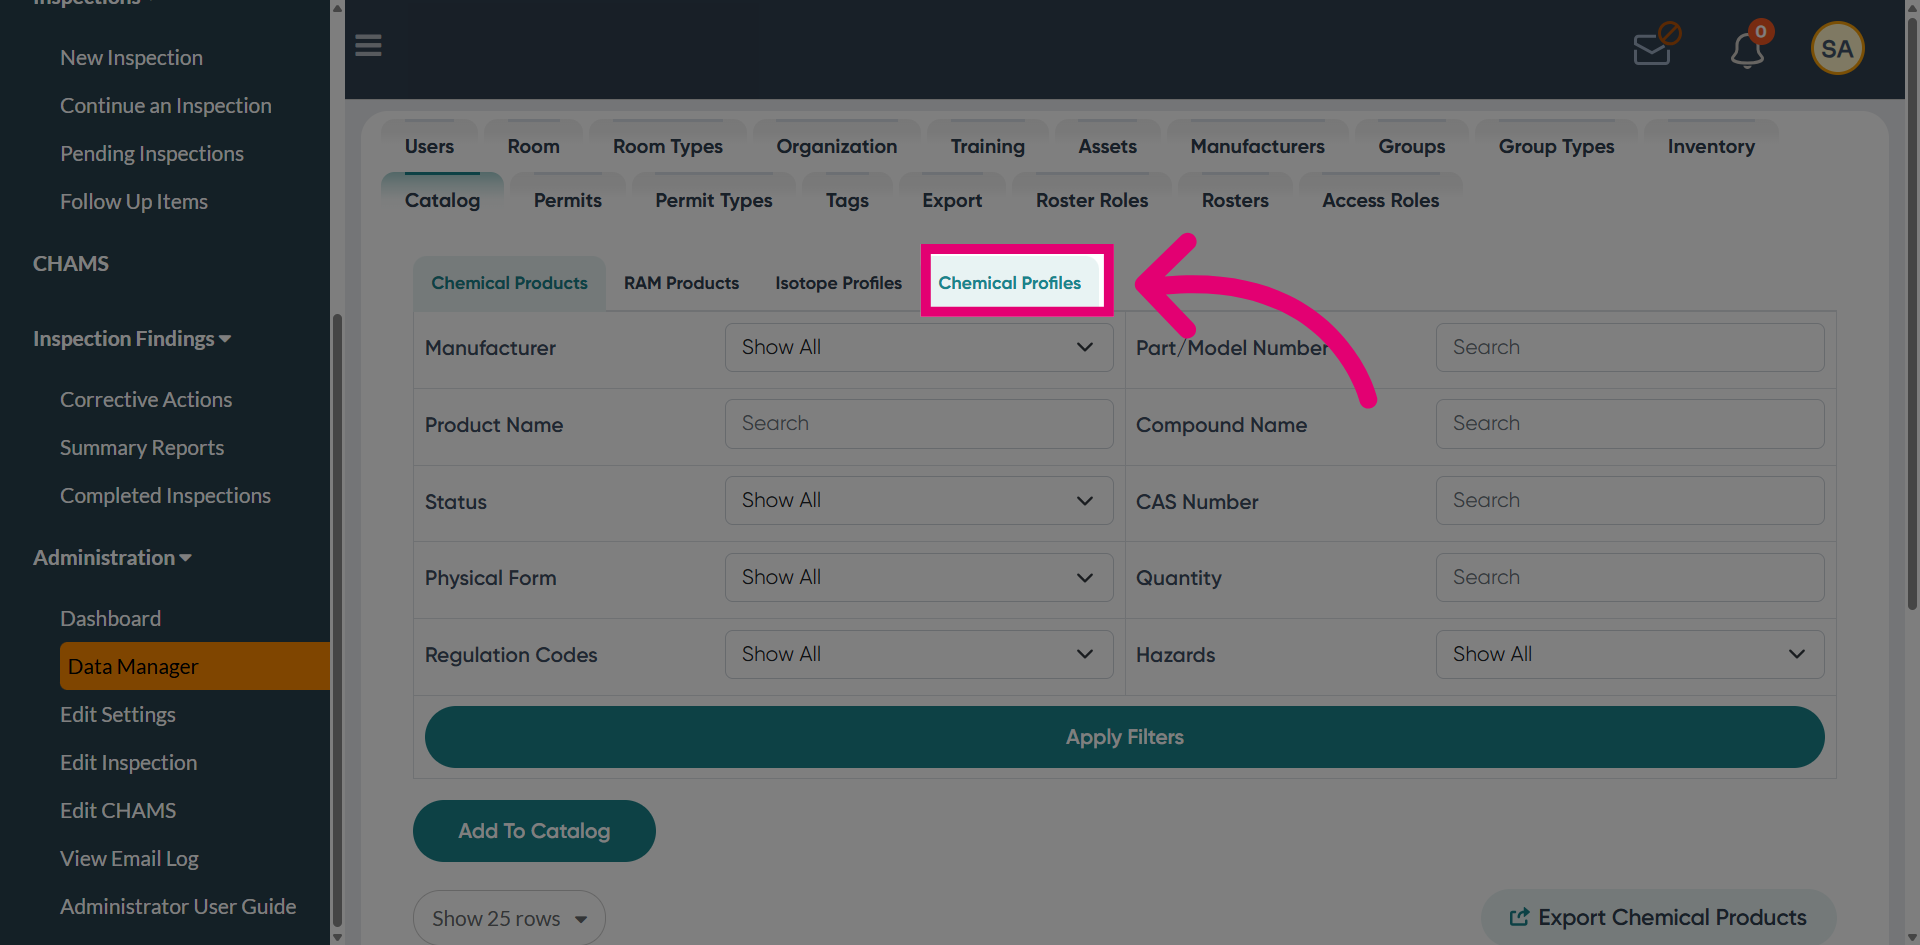
Access Chemical Profiles to modify chemical information and testing requirements.
Select the chemical identifier (e.g., Ethanol) to configure its testing frequencies by selecting the view option.
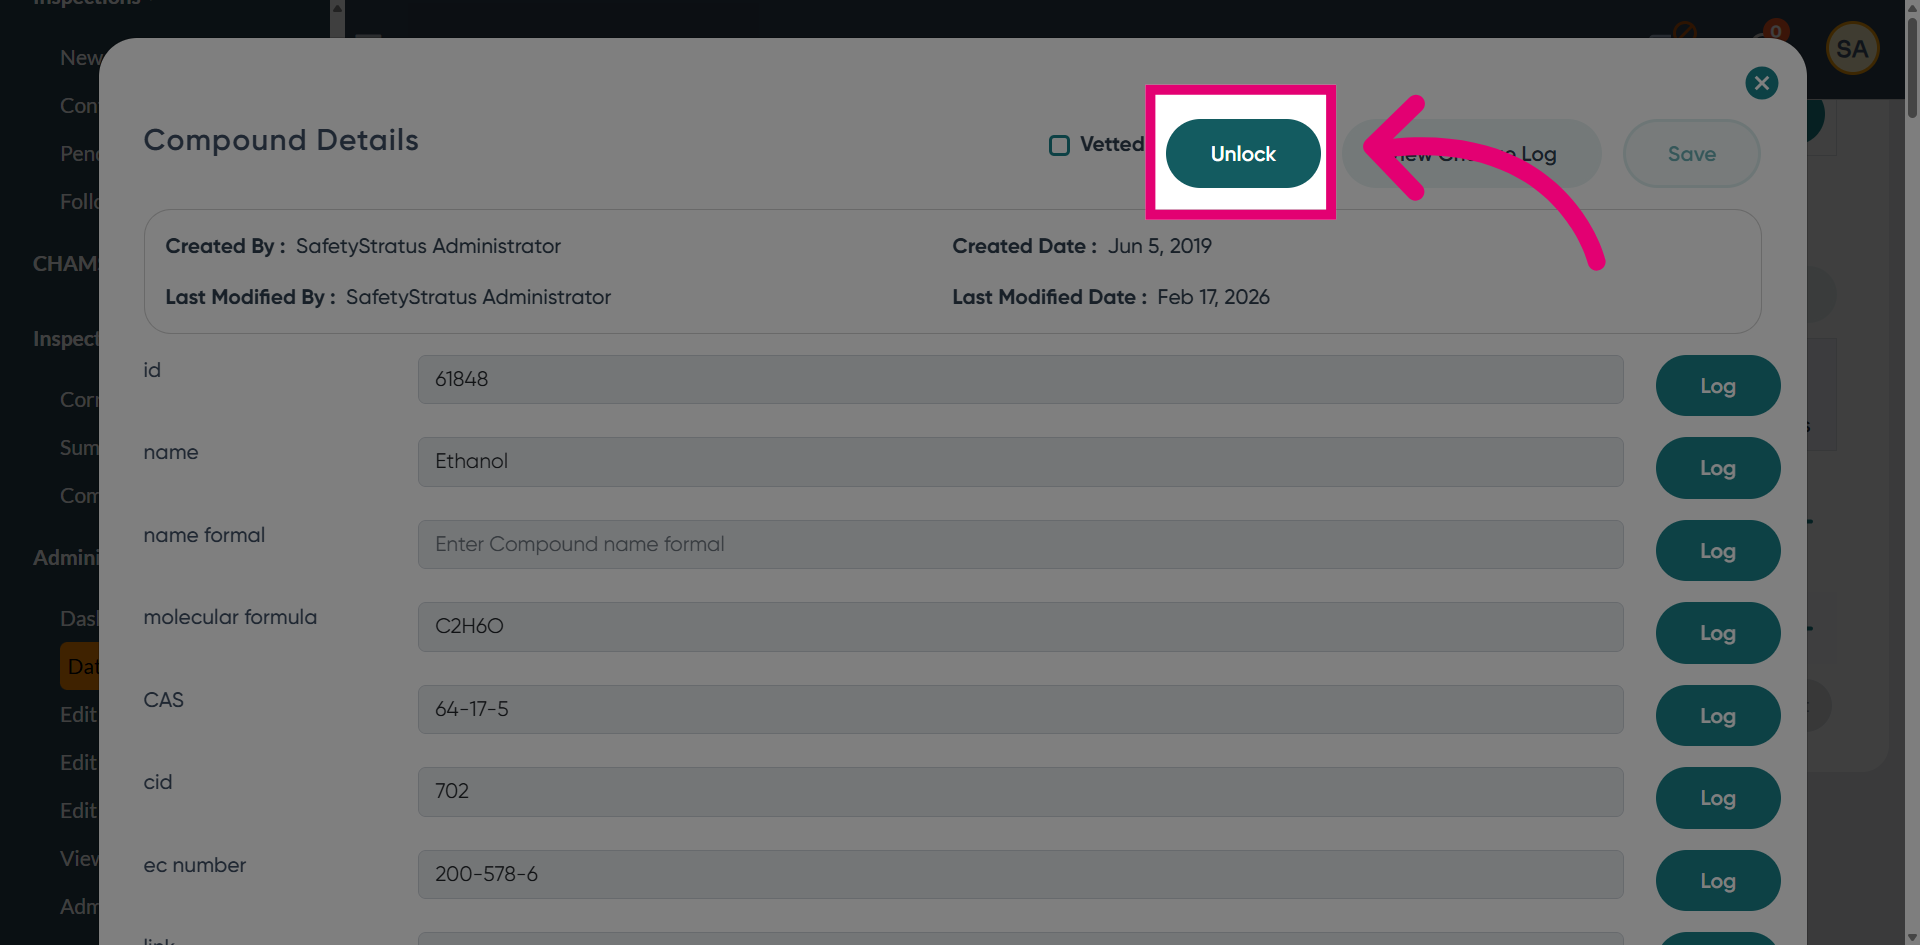
Click Unlock to enable editing of the chemical's test settings.
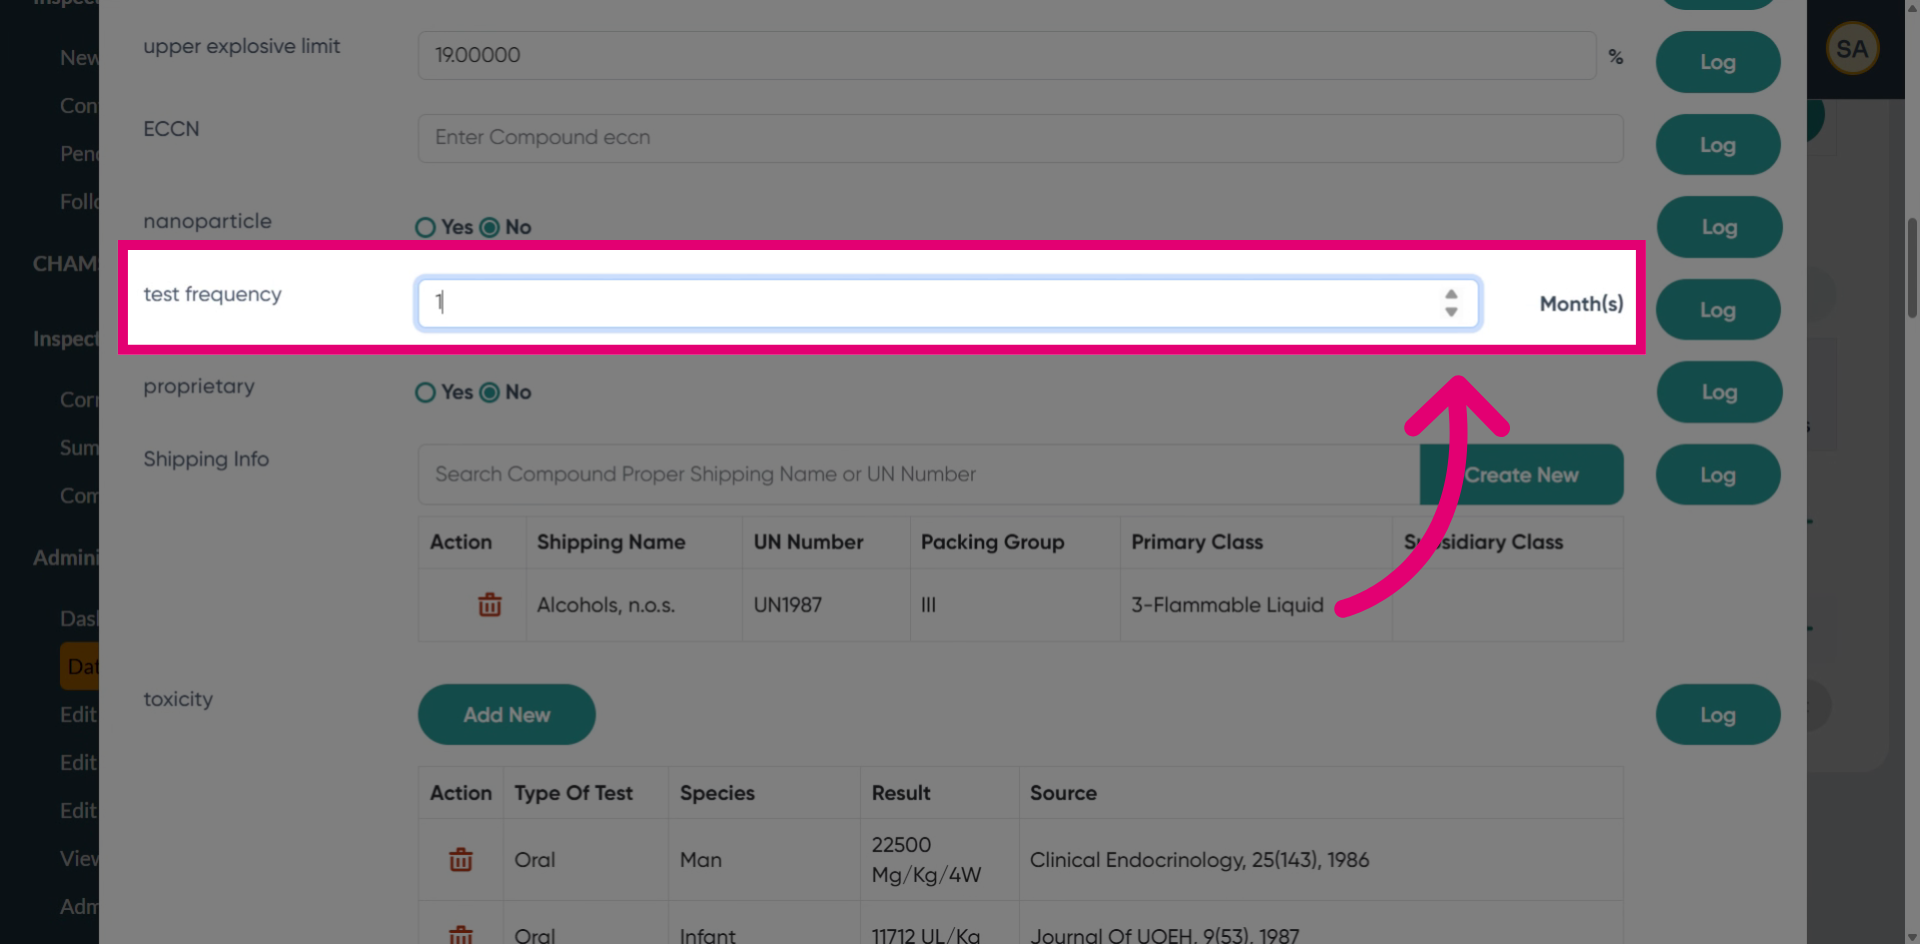
Enter the desired test frequency to define the interval between tests. In this example, the frequency is set to 2.
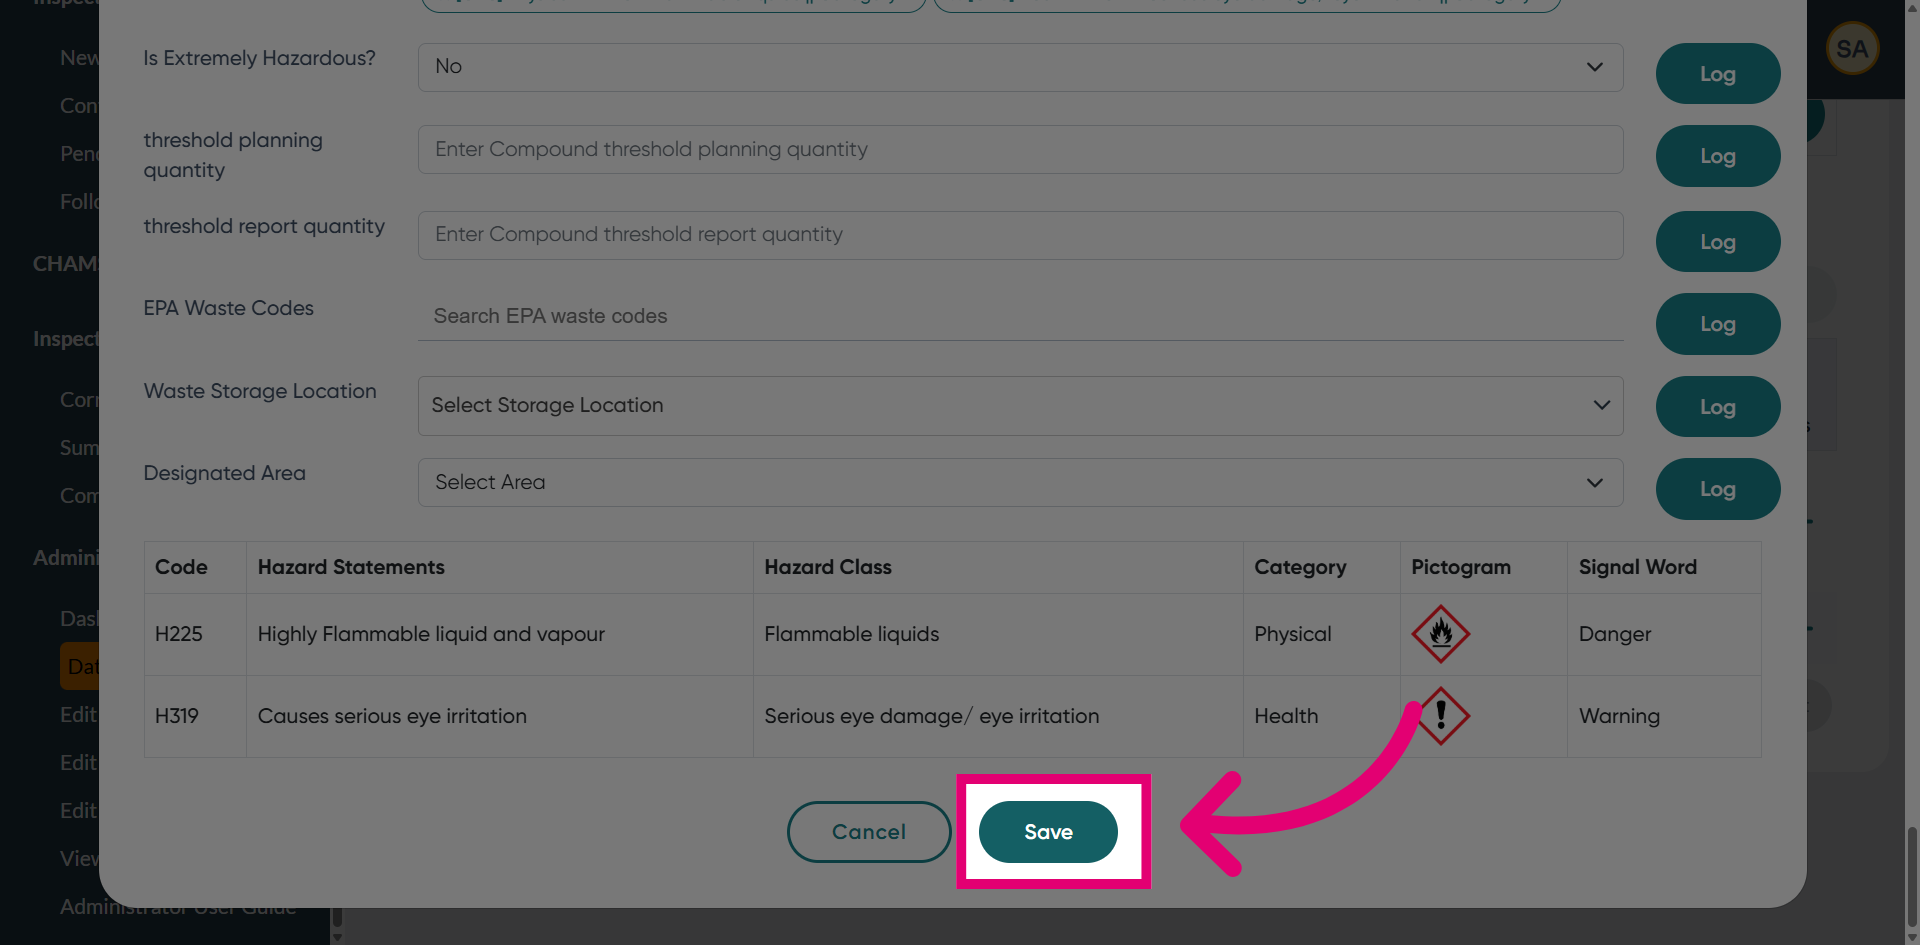
Choose Save to apply the changes to the test settings.
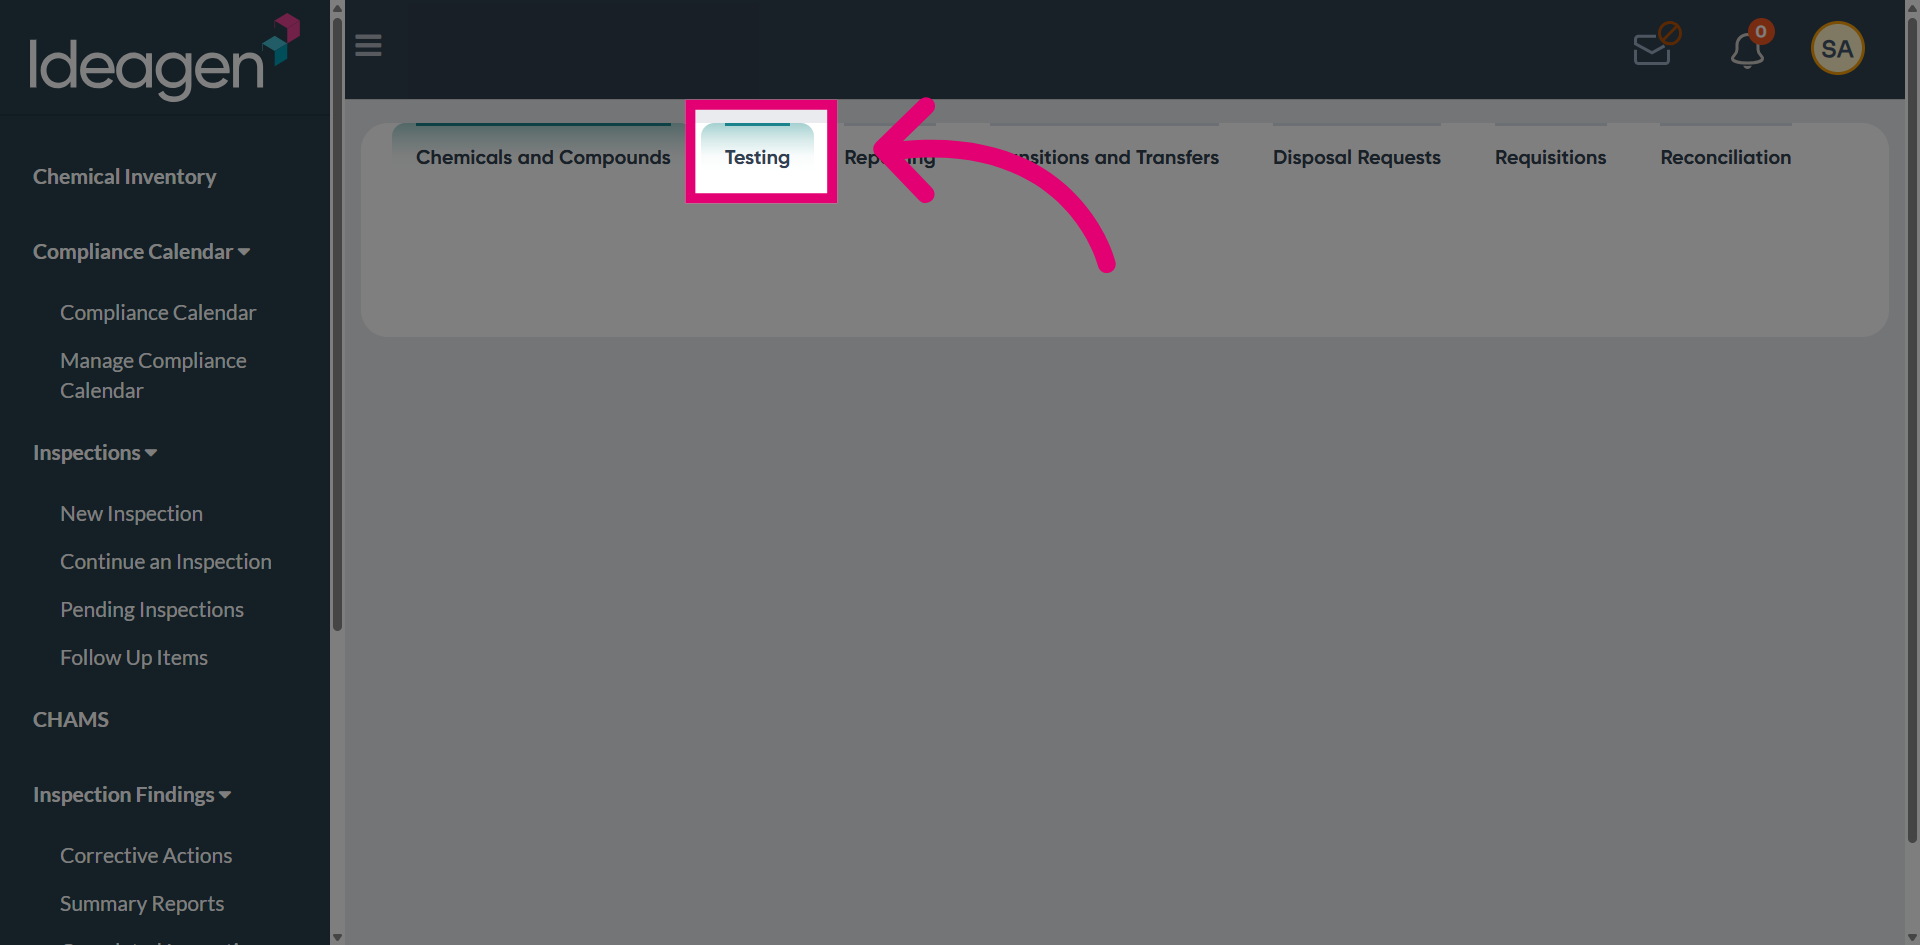
Go to the Inventory section to review chemical records.
Navigate to Testing to manage chemical test results and schedules.
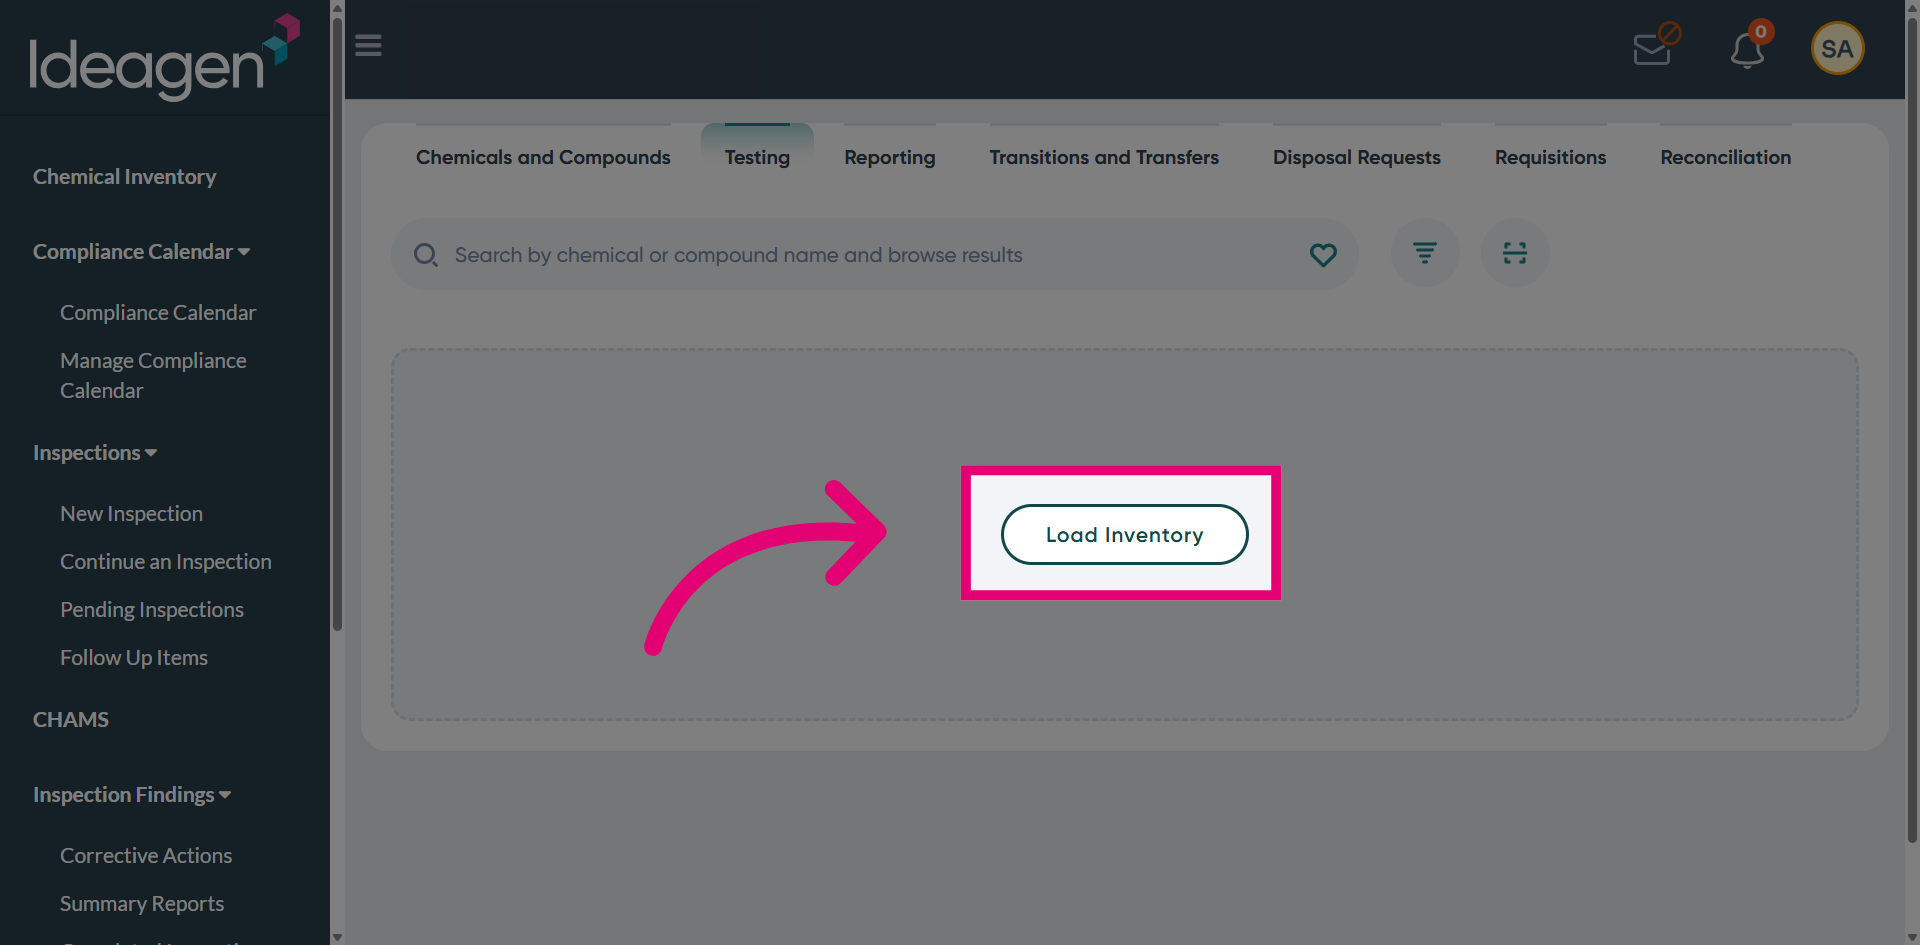
Use Load Inventory to fetch the test records.
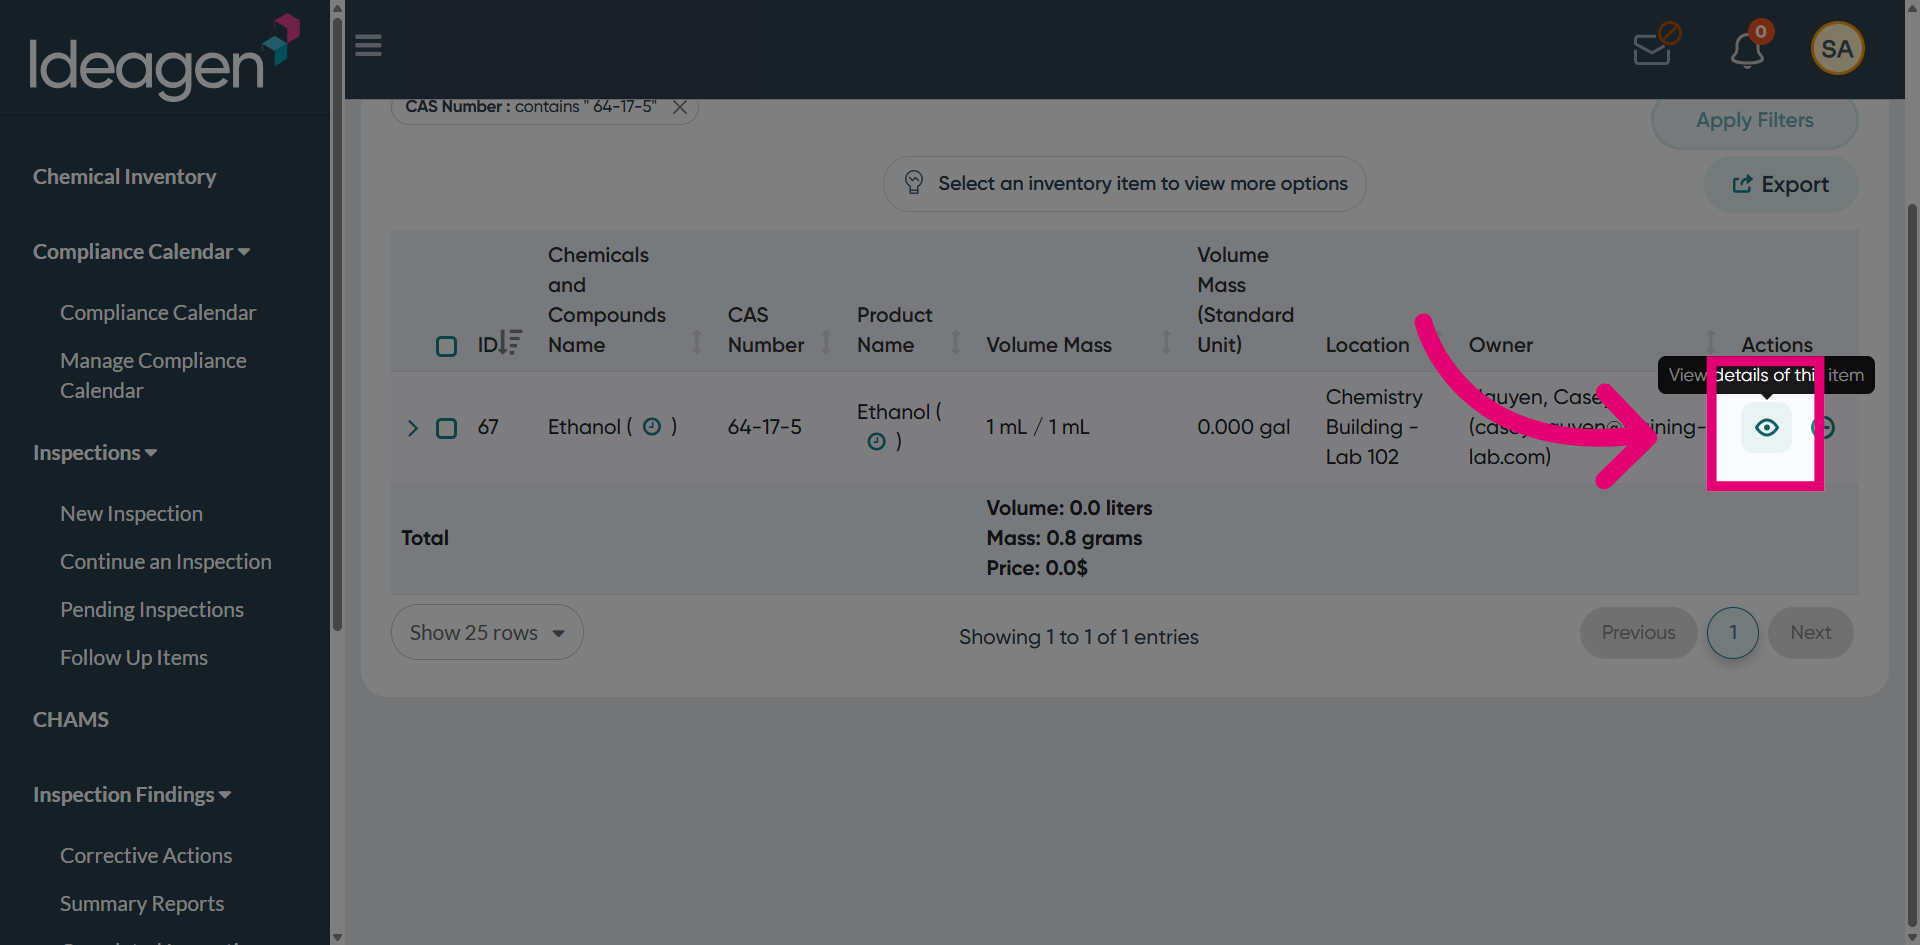
Open View to review related inventory and test information.
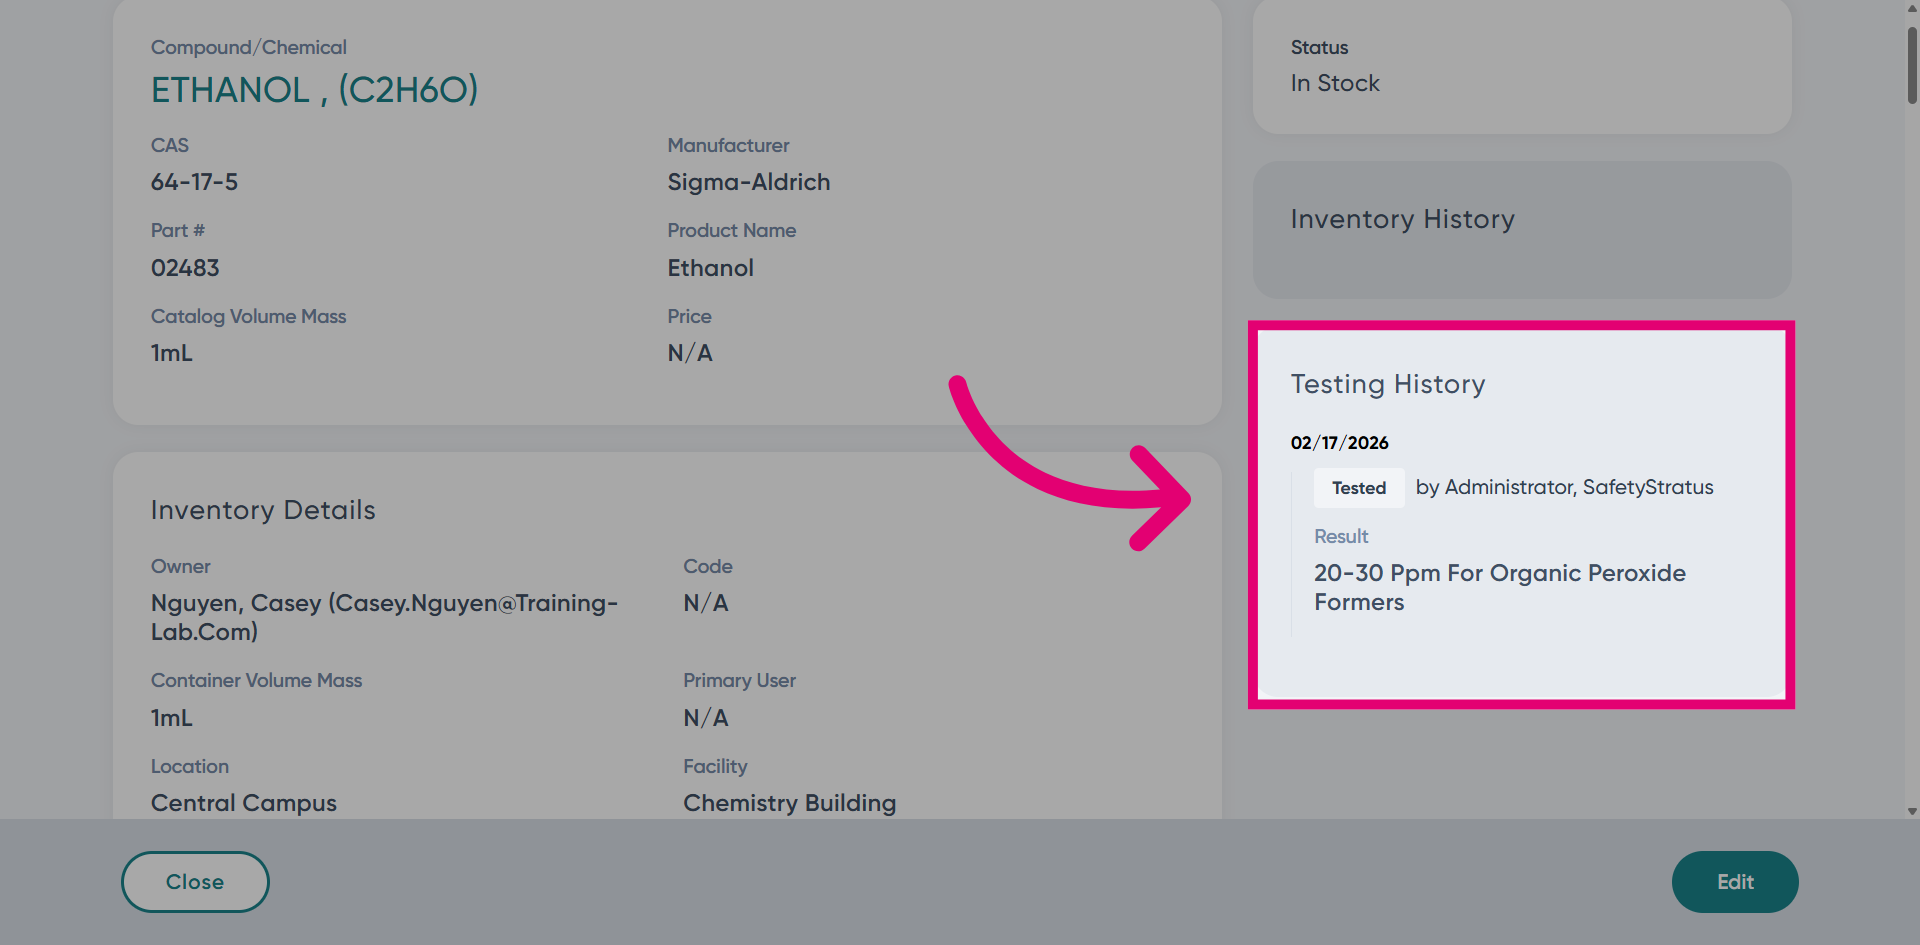
View the Testing History to review past chemical test records and results.
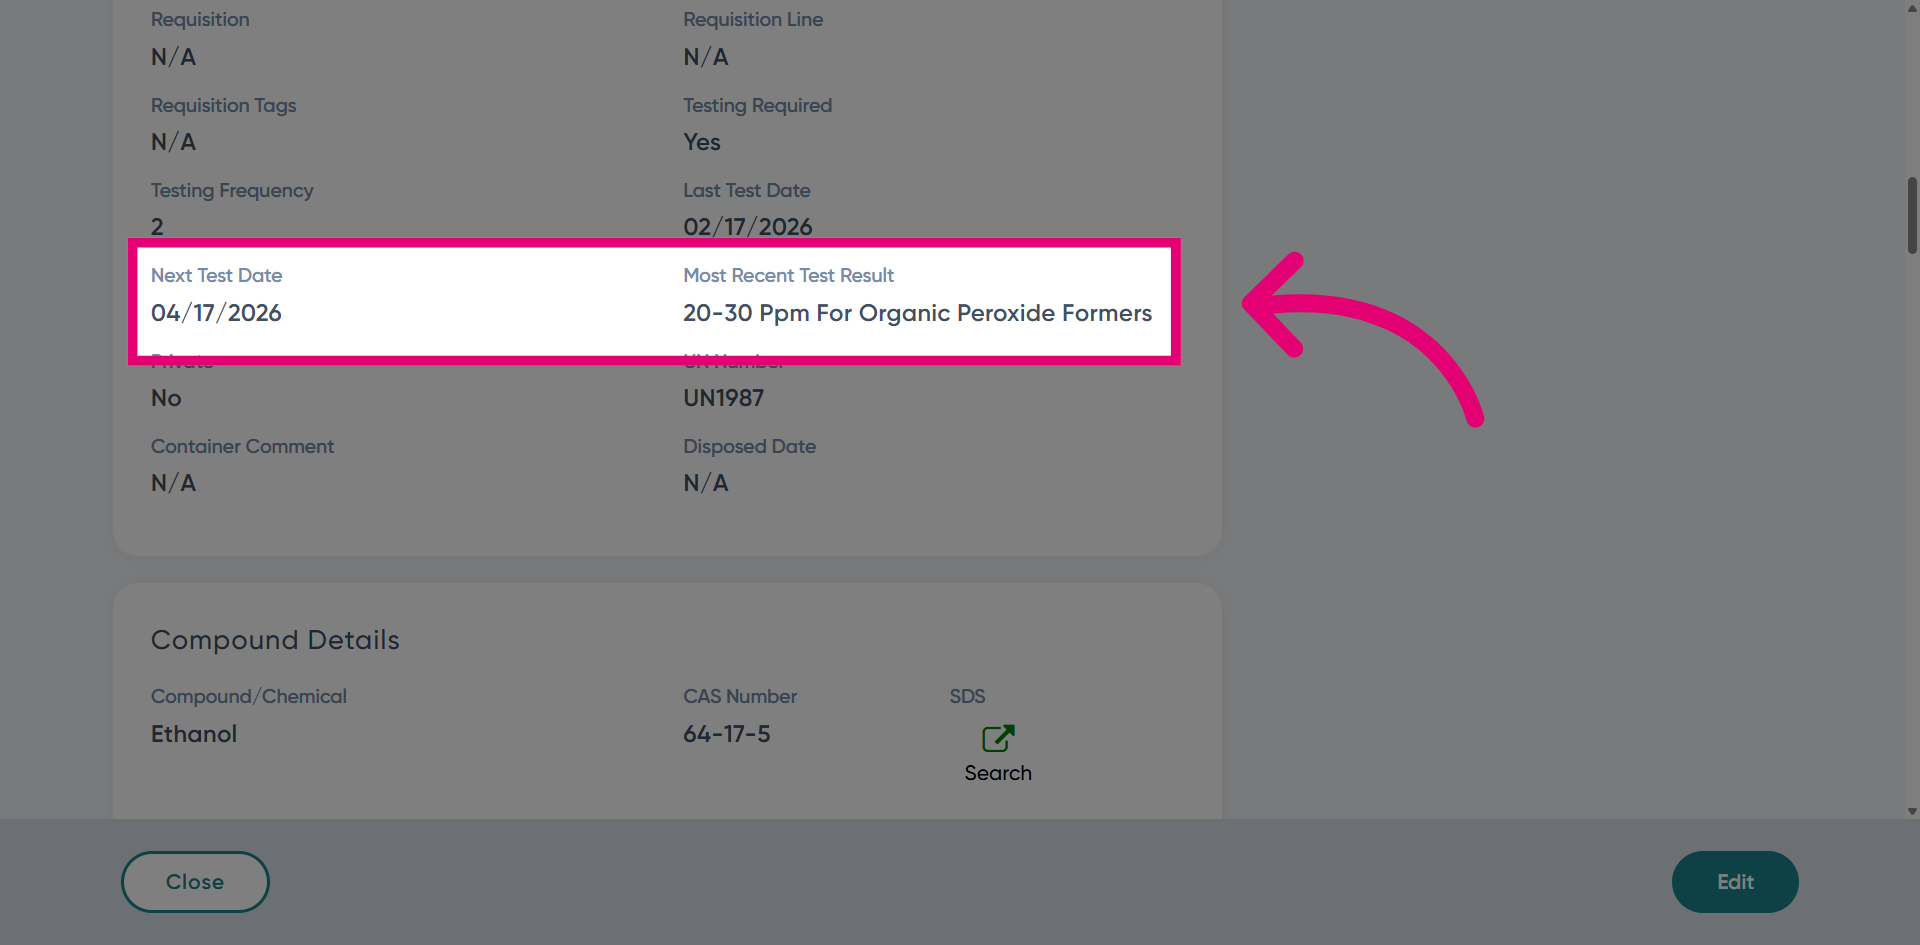
View the Next Test Date for the scheduled testing date. The most recent test result displays the related chemical test results.
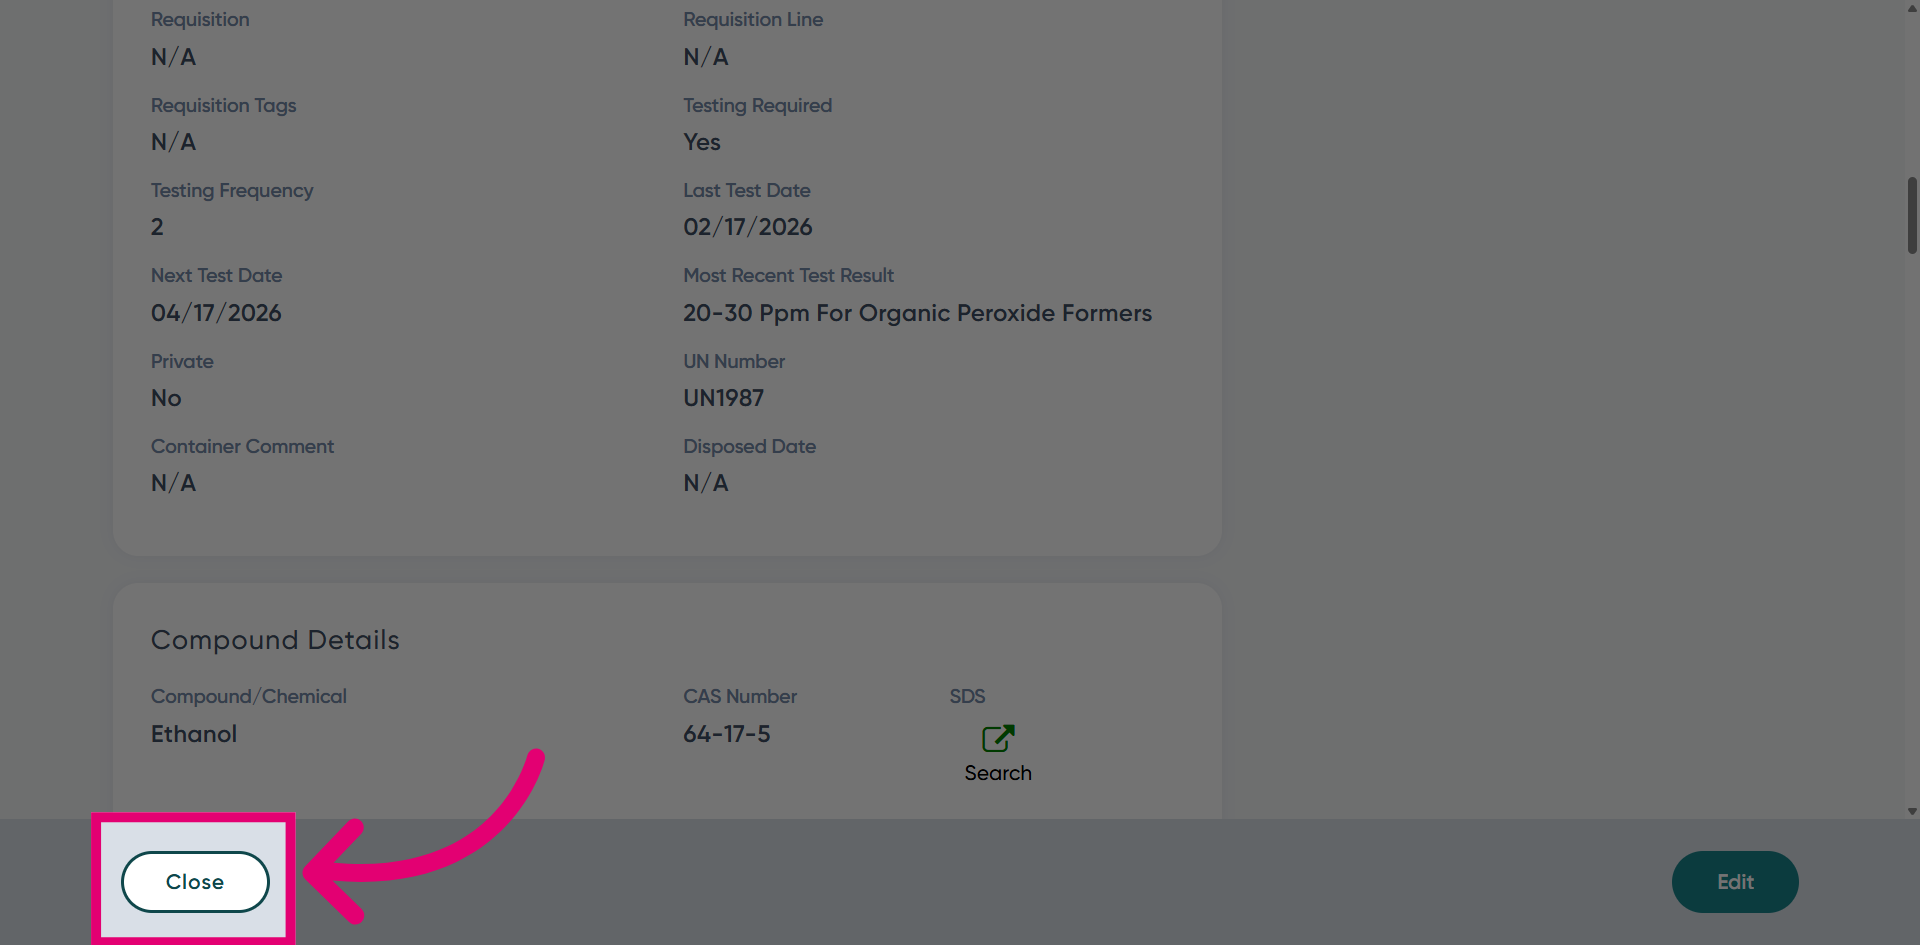
Choose Close to exit the detailed view.
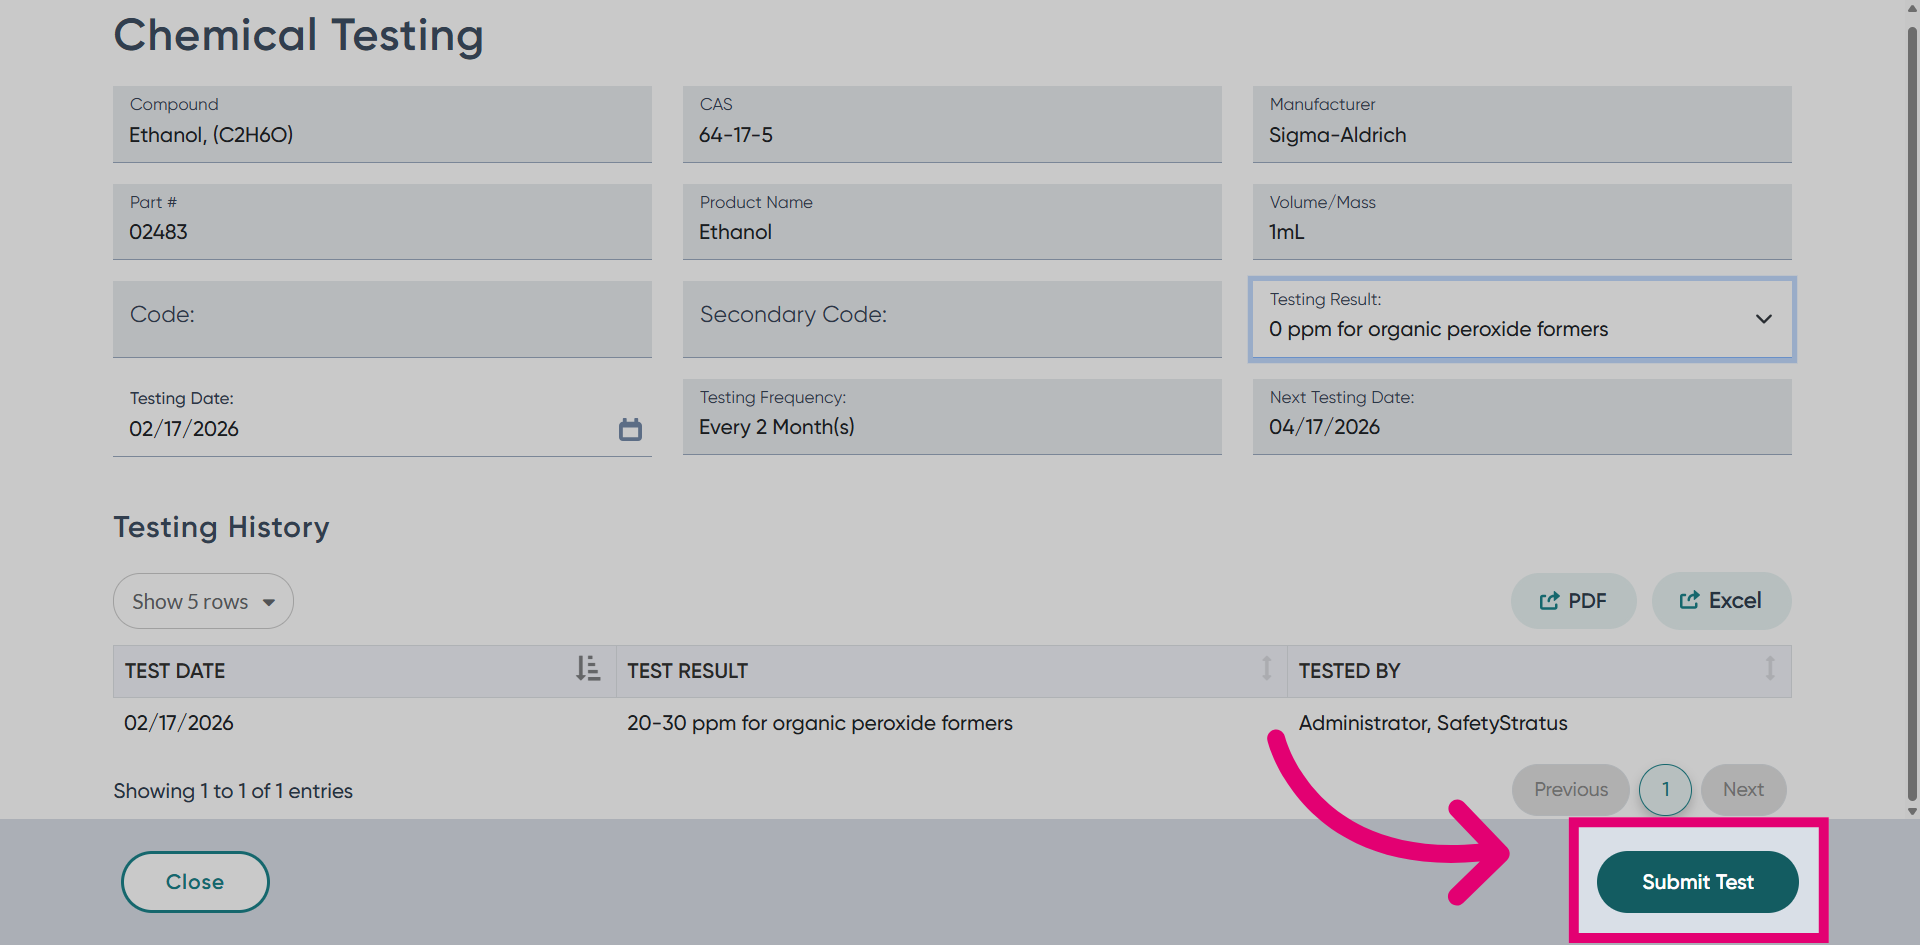
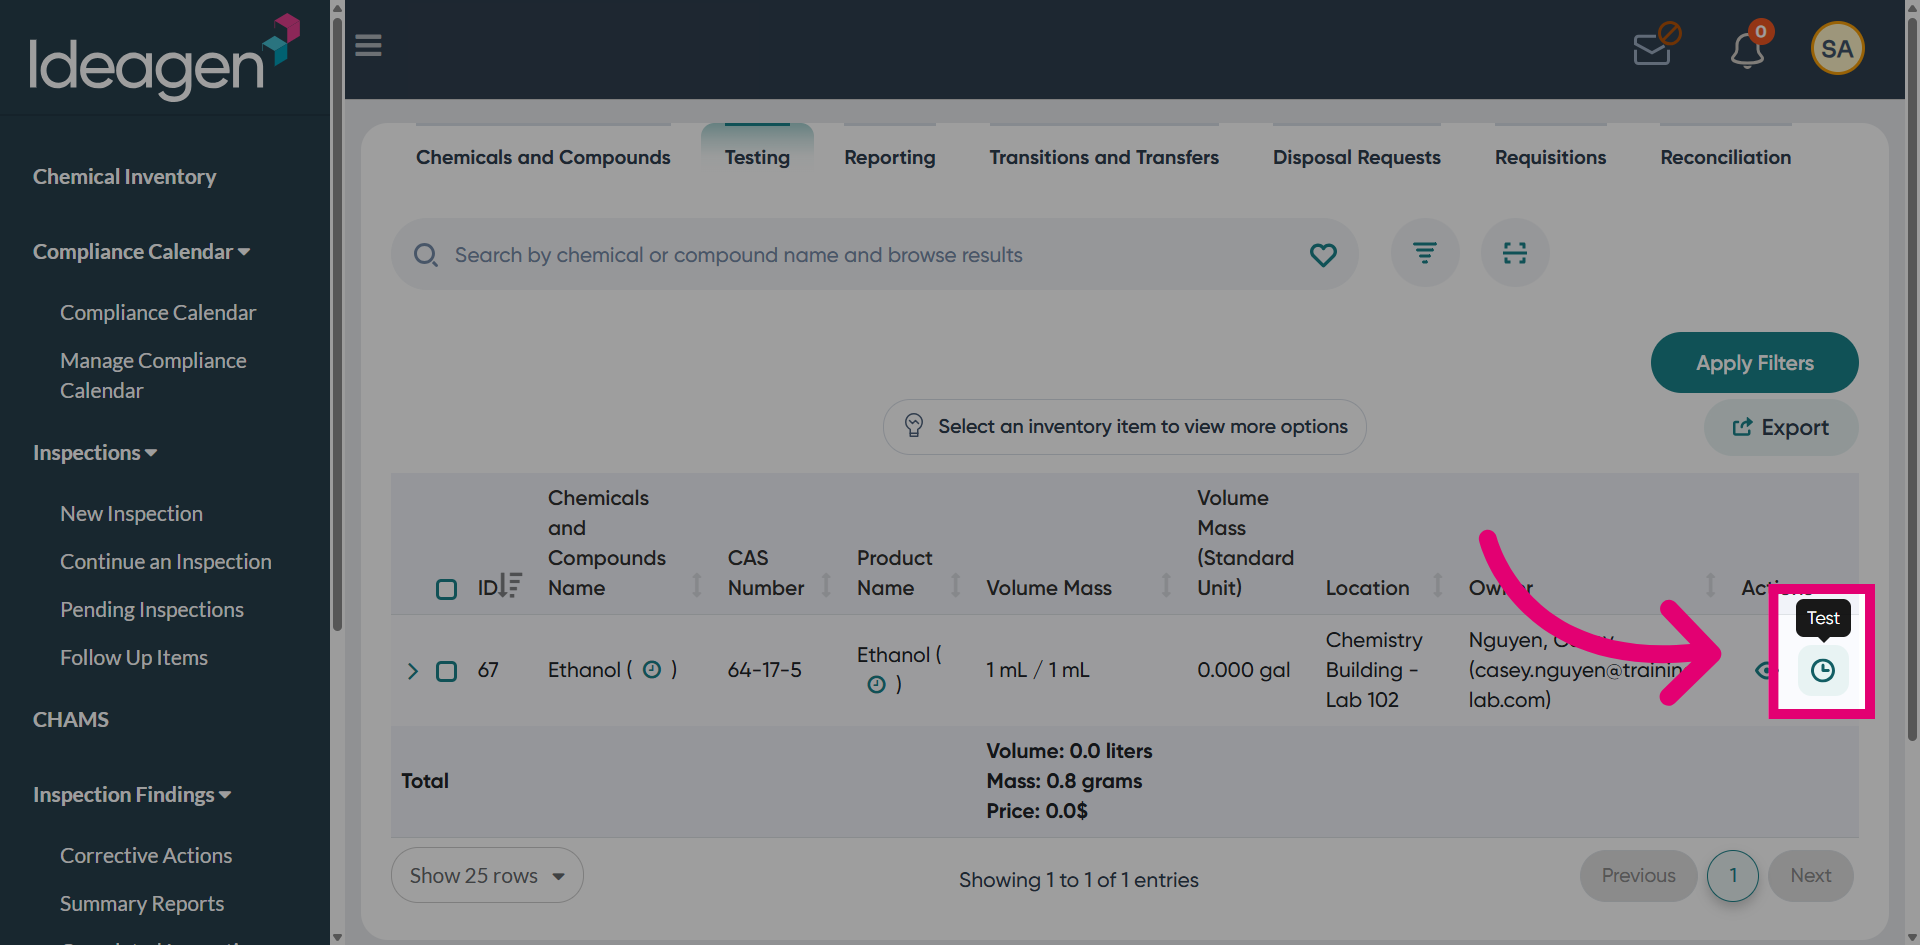
Use the Test option to create a new test entry for the chemical.
Select the testing result from the dropdown menu. The next test date can be adjusted if needed; however, the testing frequency remains set to every two months.
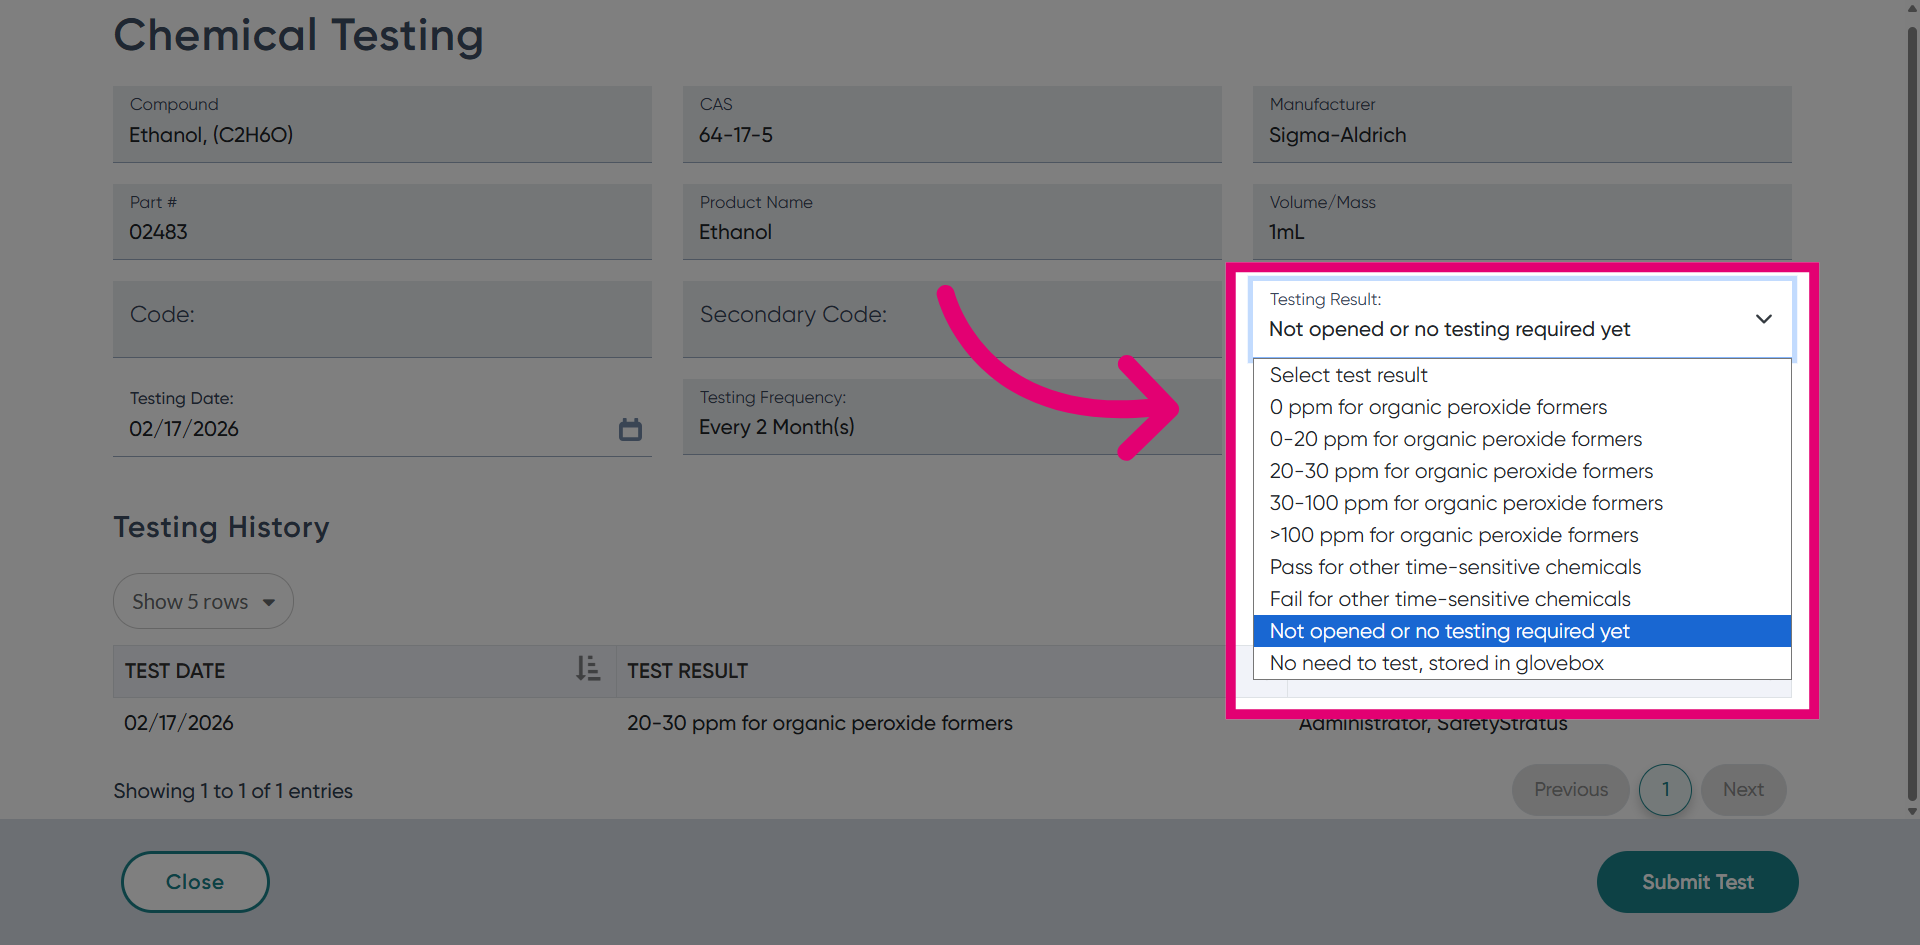
Choose Submit Test to complete and save the testing entry.