New article
Recently updated
Sending an in-app bulletin

Who is this article for?
Administrators who want to learn to send an in-app bulletin.
Administrator permissions are required.
This tutorial walks you through the process of creating and sending in-app bulletins.
You will learn how to compose bulletin messages, attach files, select recipients, and confirm delivery.
1. Sending an in-app bulletin
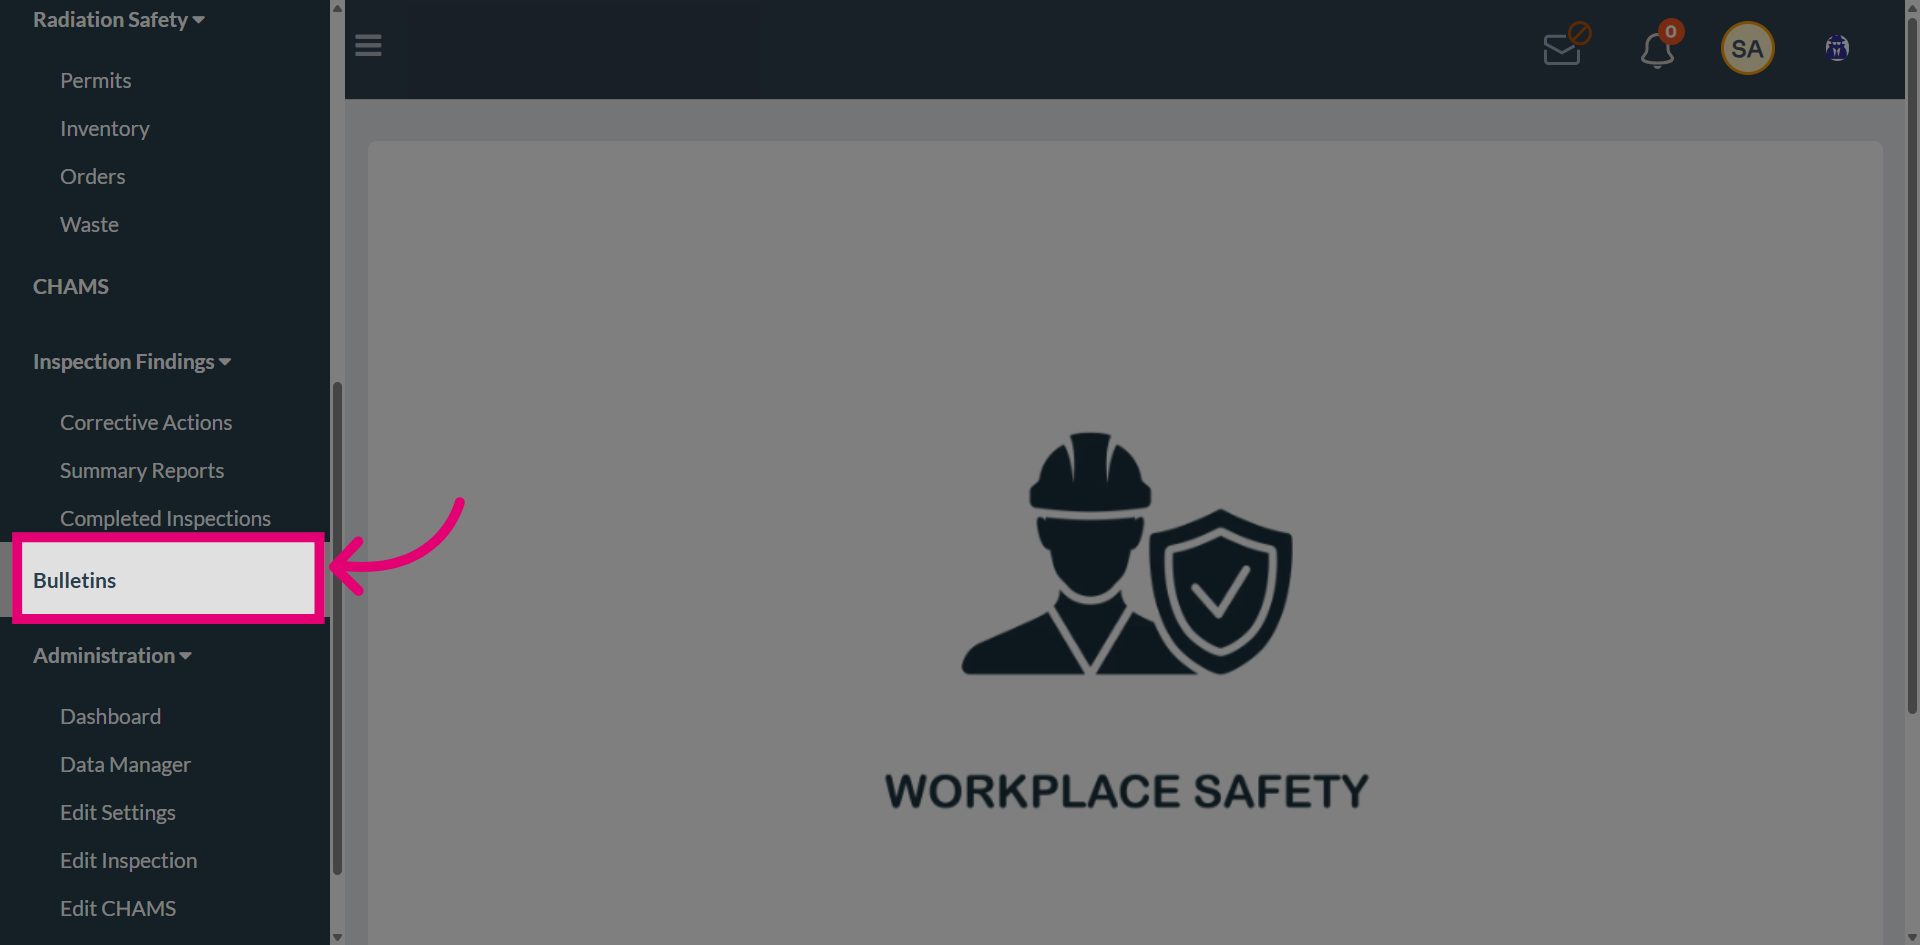
Navigate to Bulletins to access the bulletin management section.
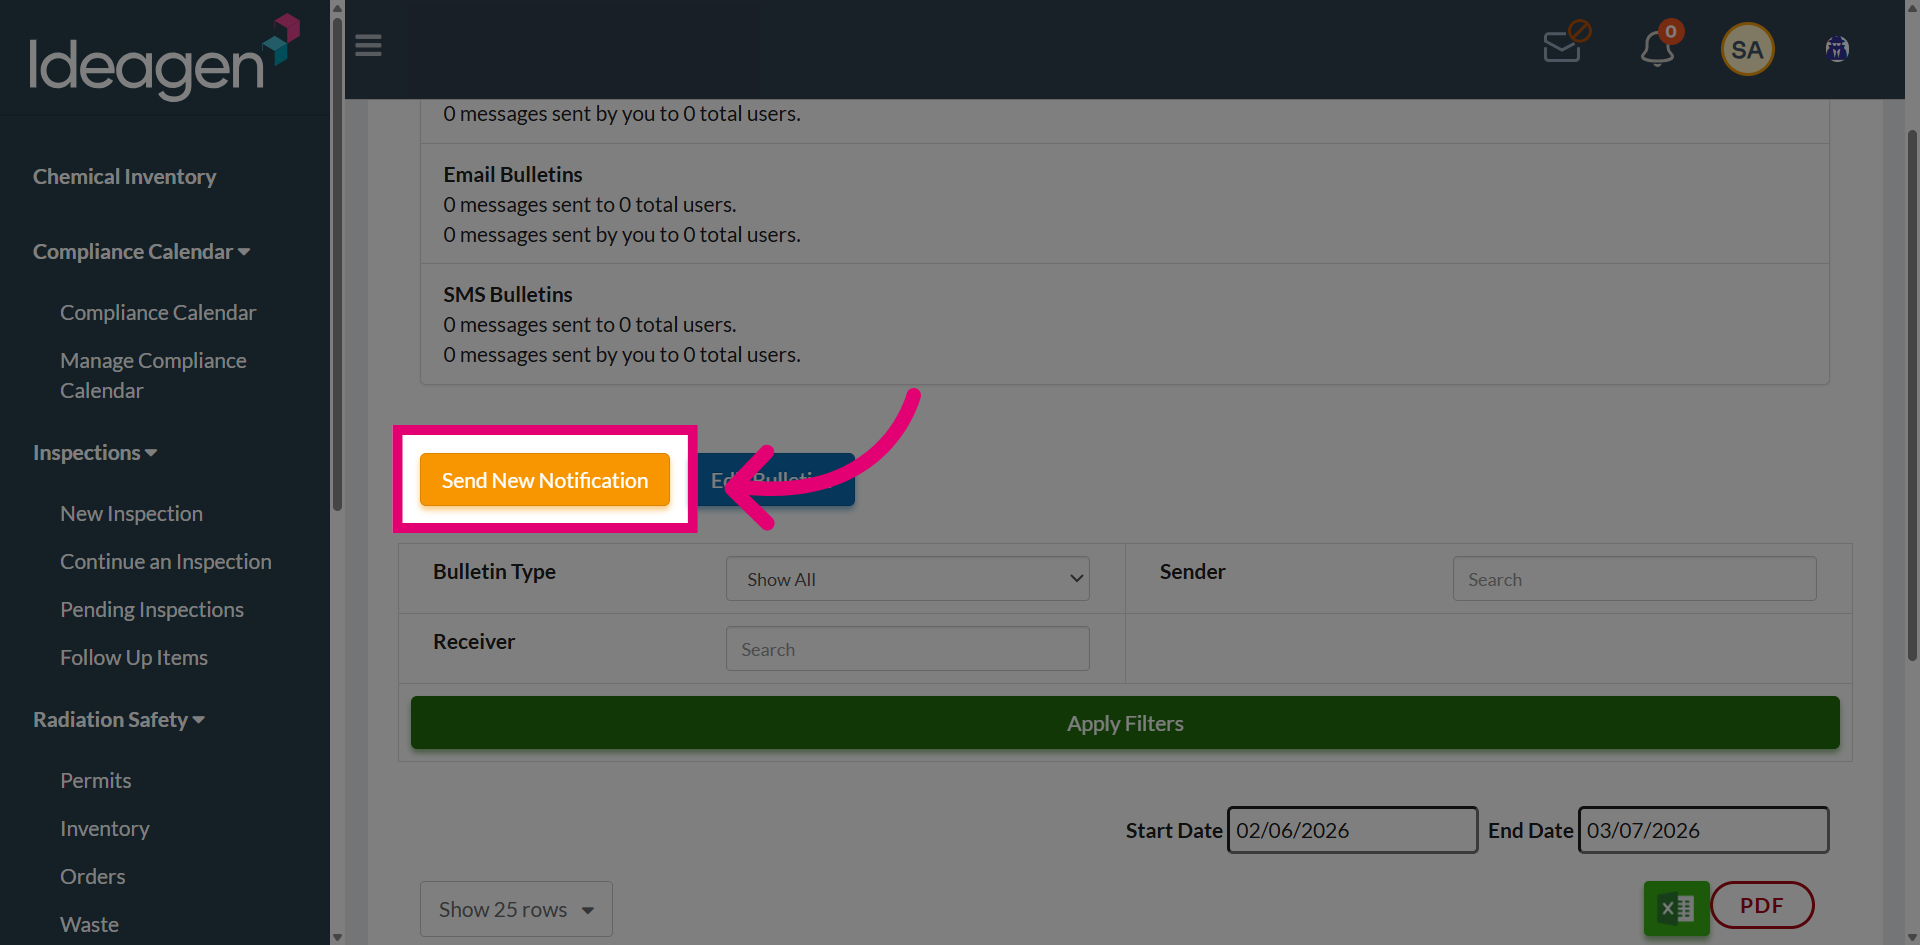
Select Send New Notification to begin composing a new bulletin.
Choose In-App Bulletins to specify the notification type you want to send.
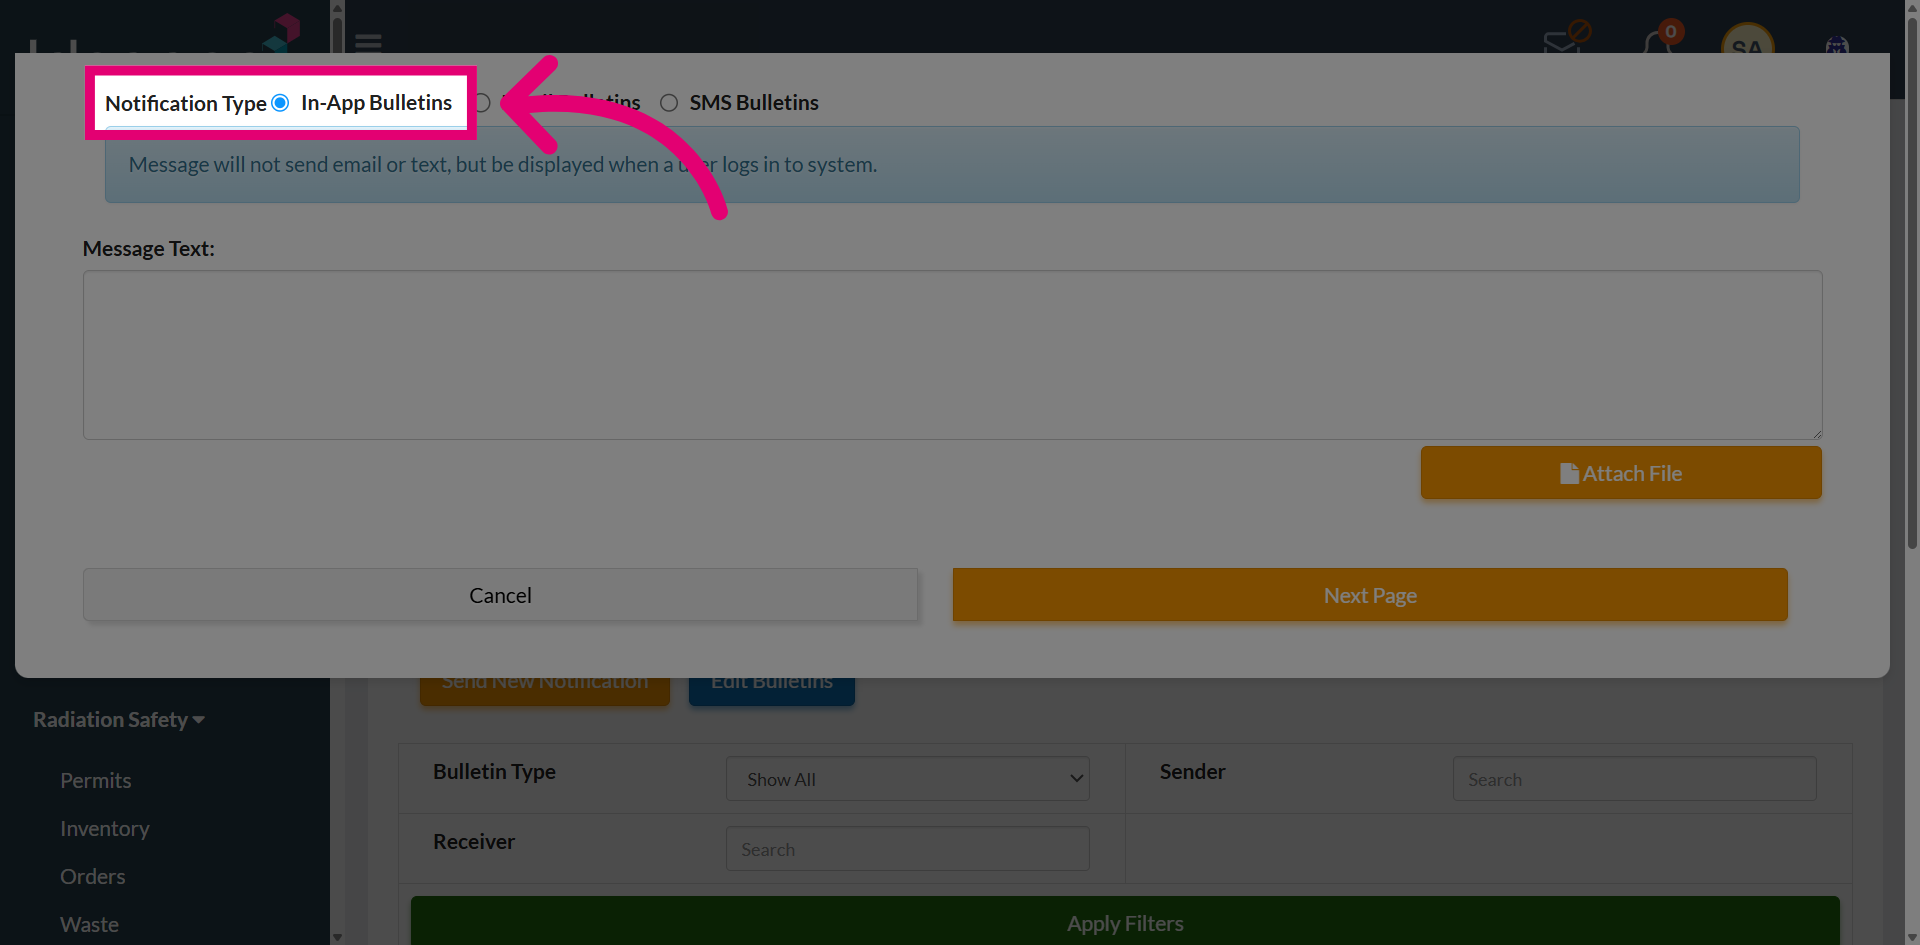
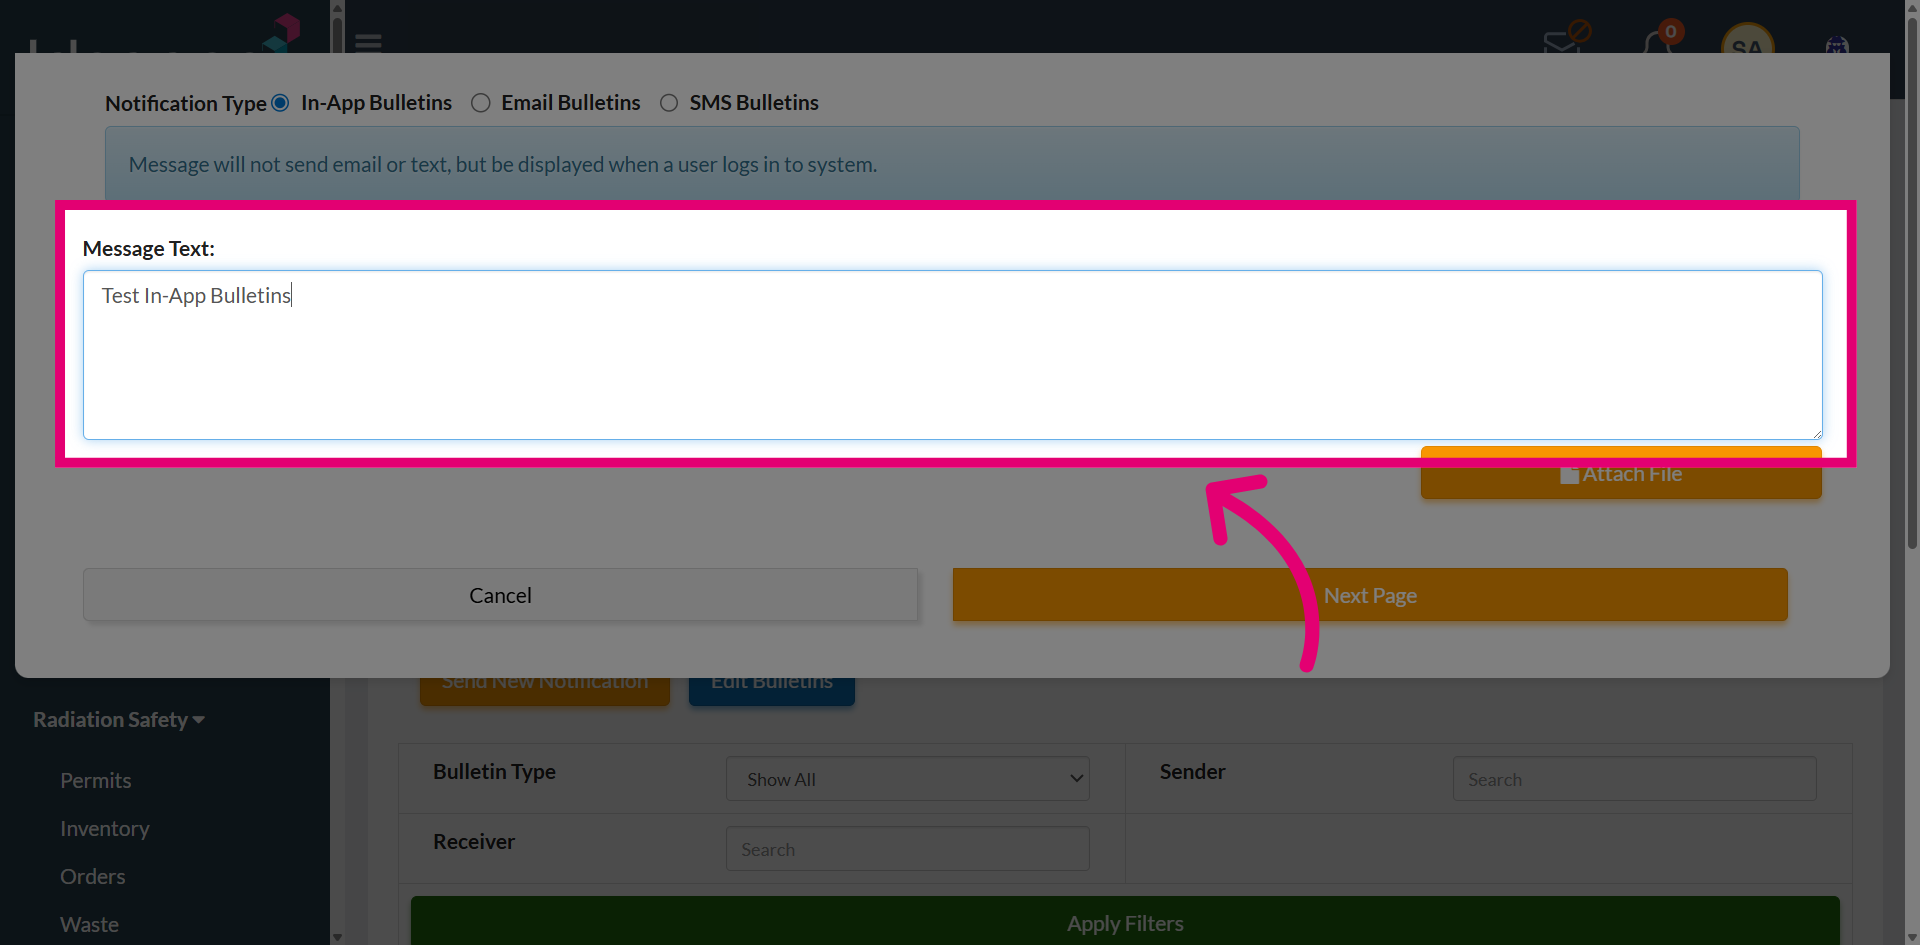
Select the Message Text field to begin entering the content of your bulletin.
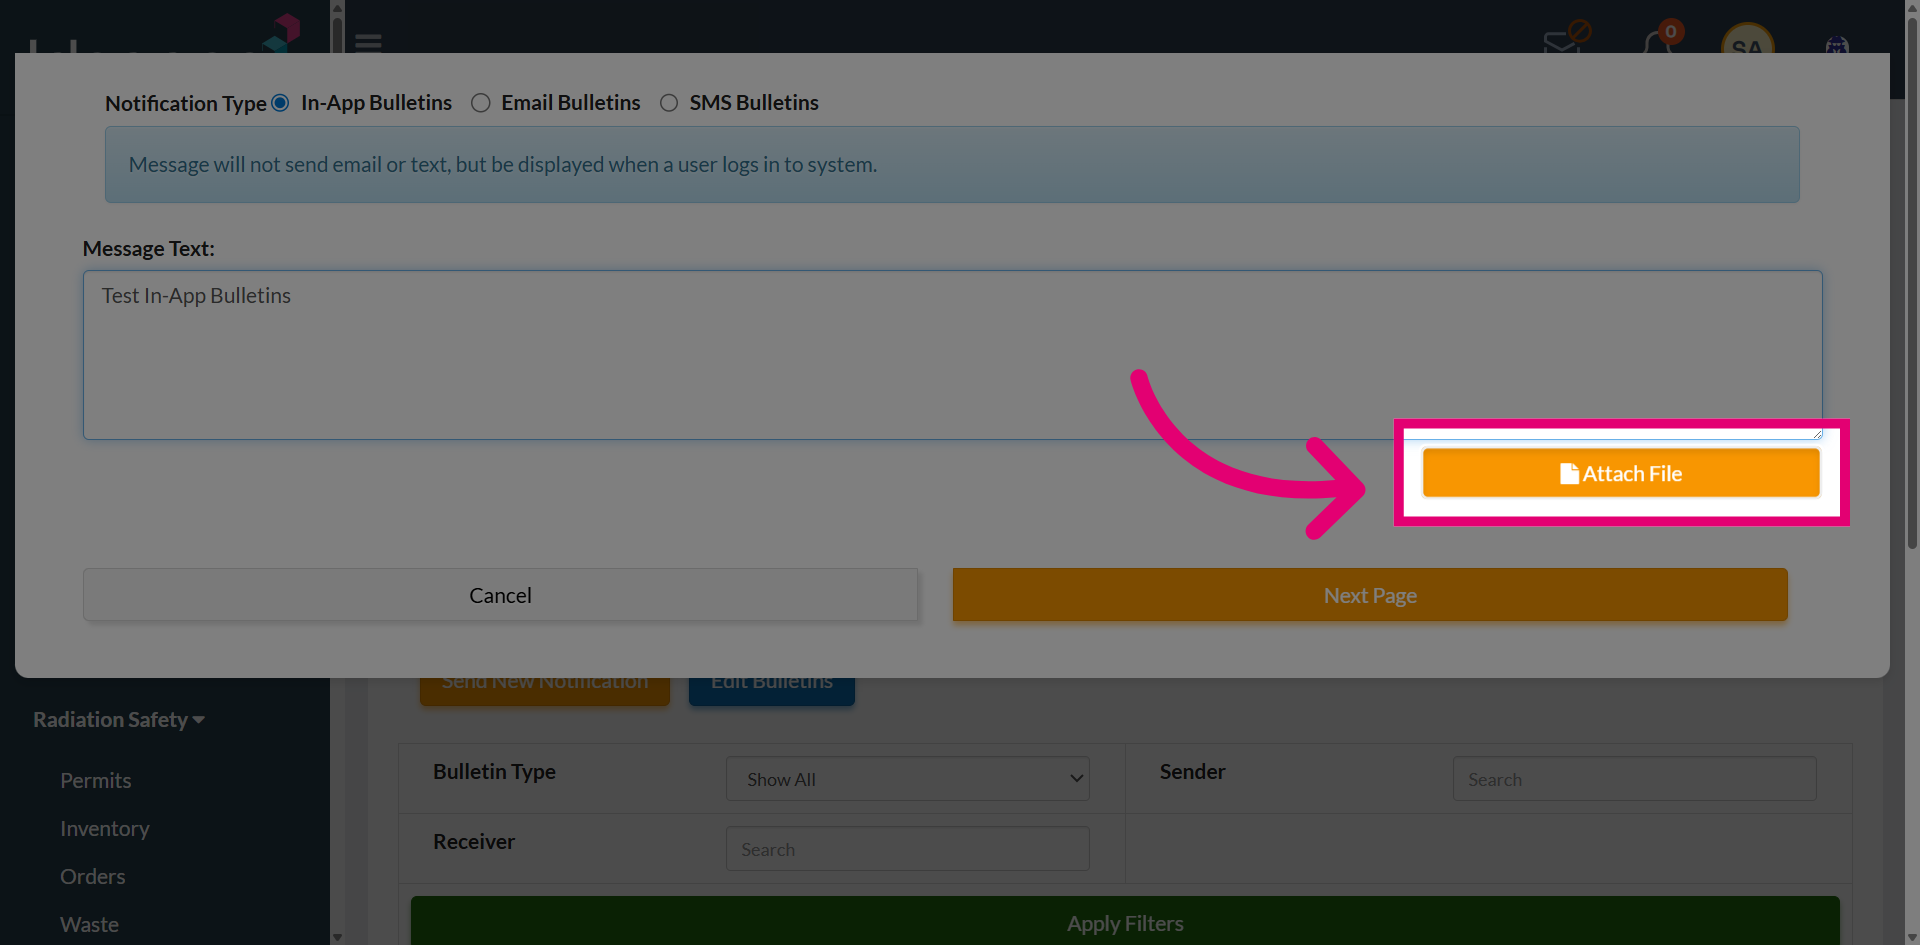
Use the Attach File option to add any relevant documents or images to bulletins.
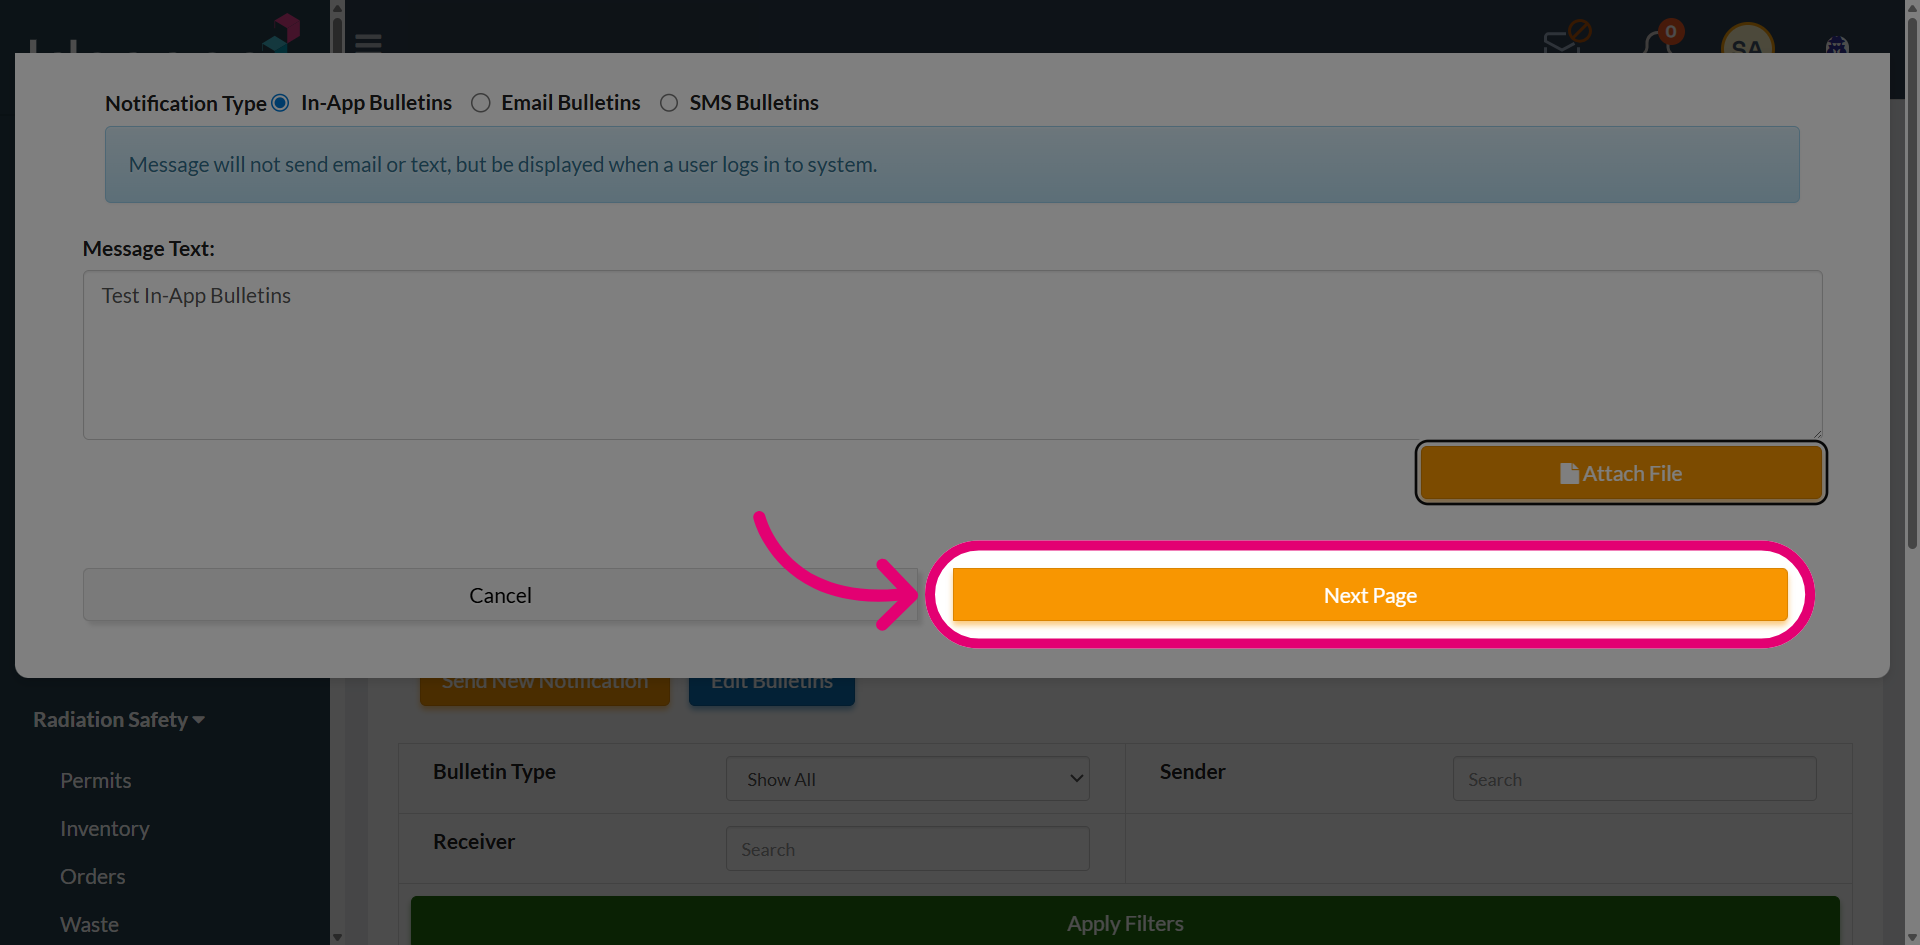
Proceed by selecting Next Page to move to the recipient selection step.
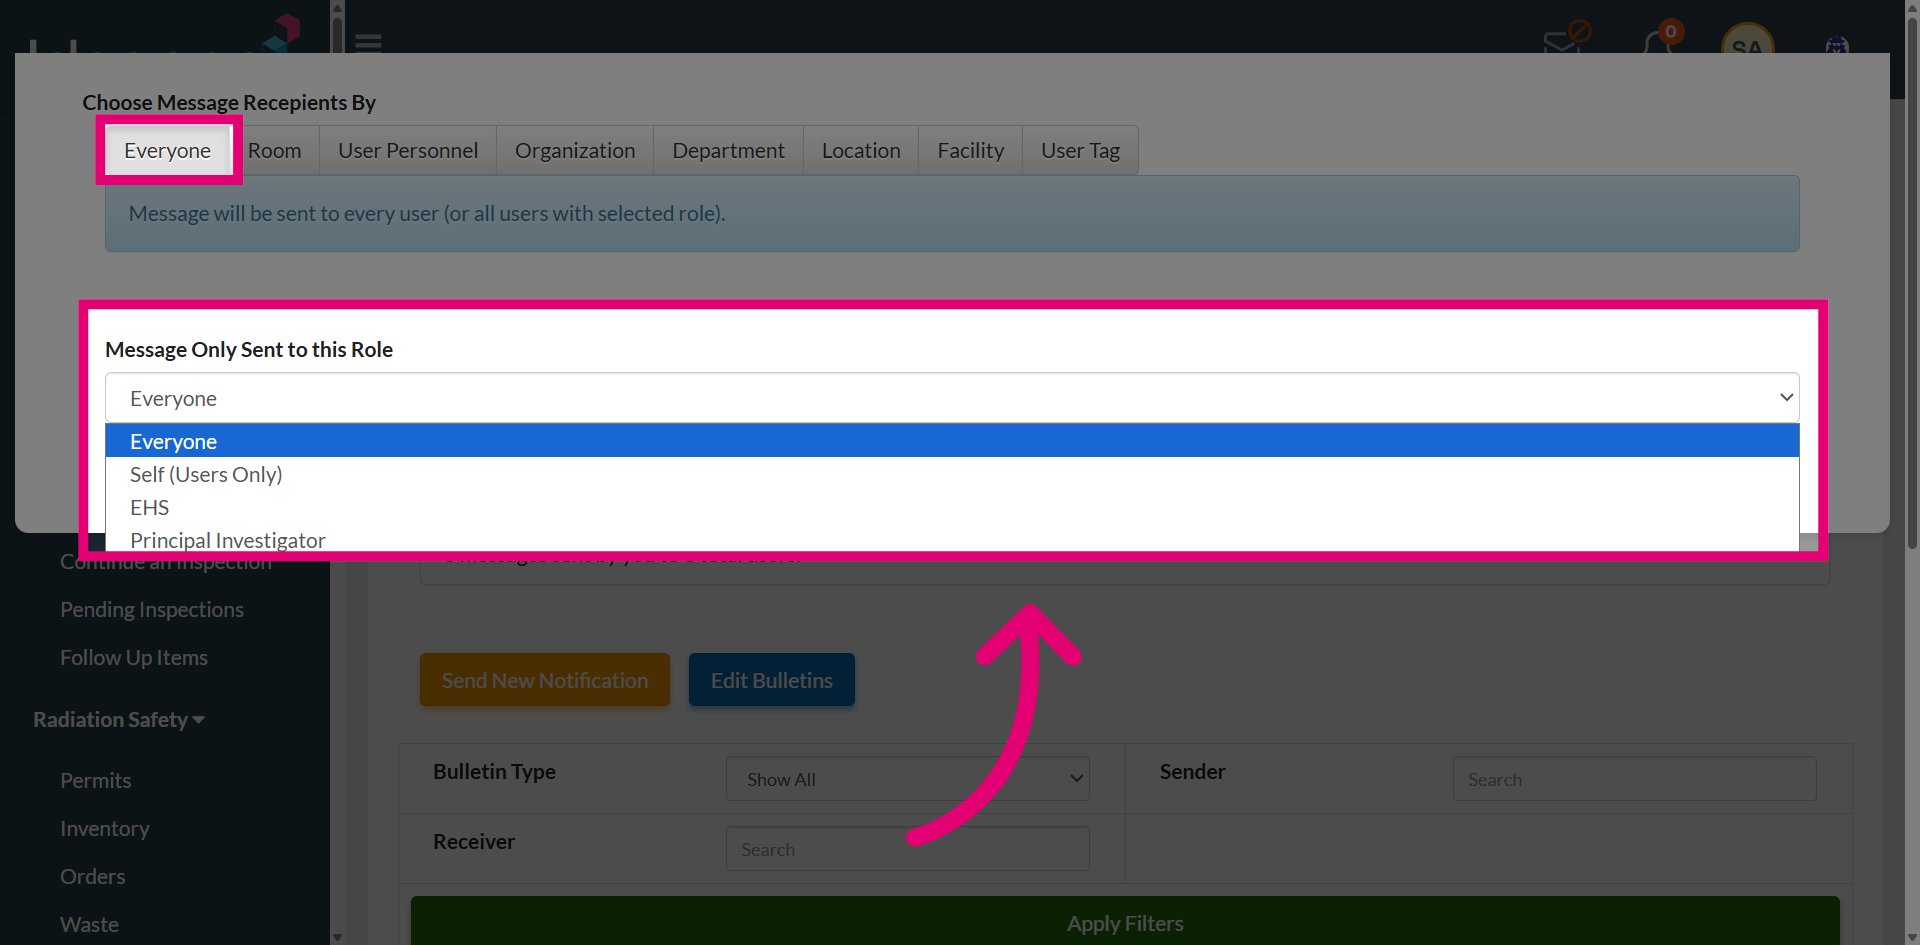
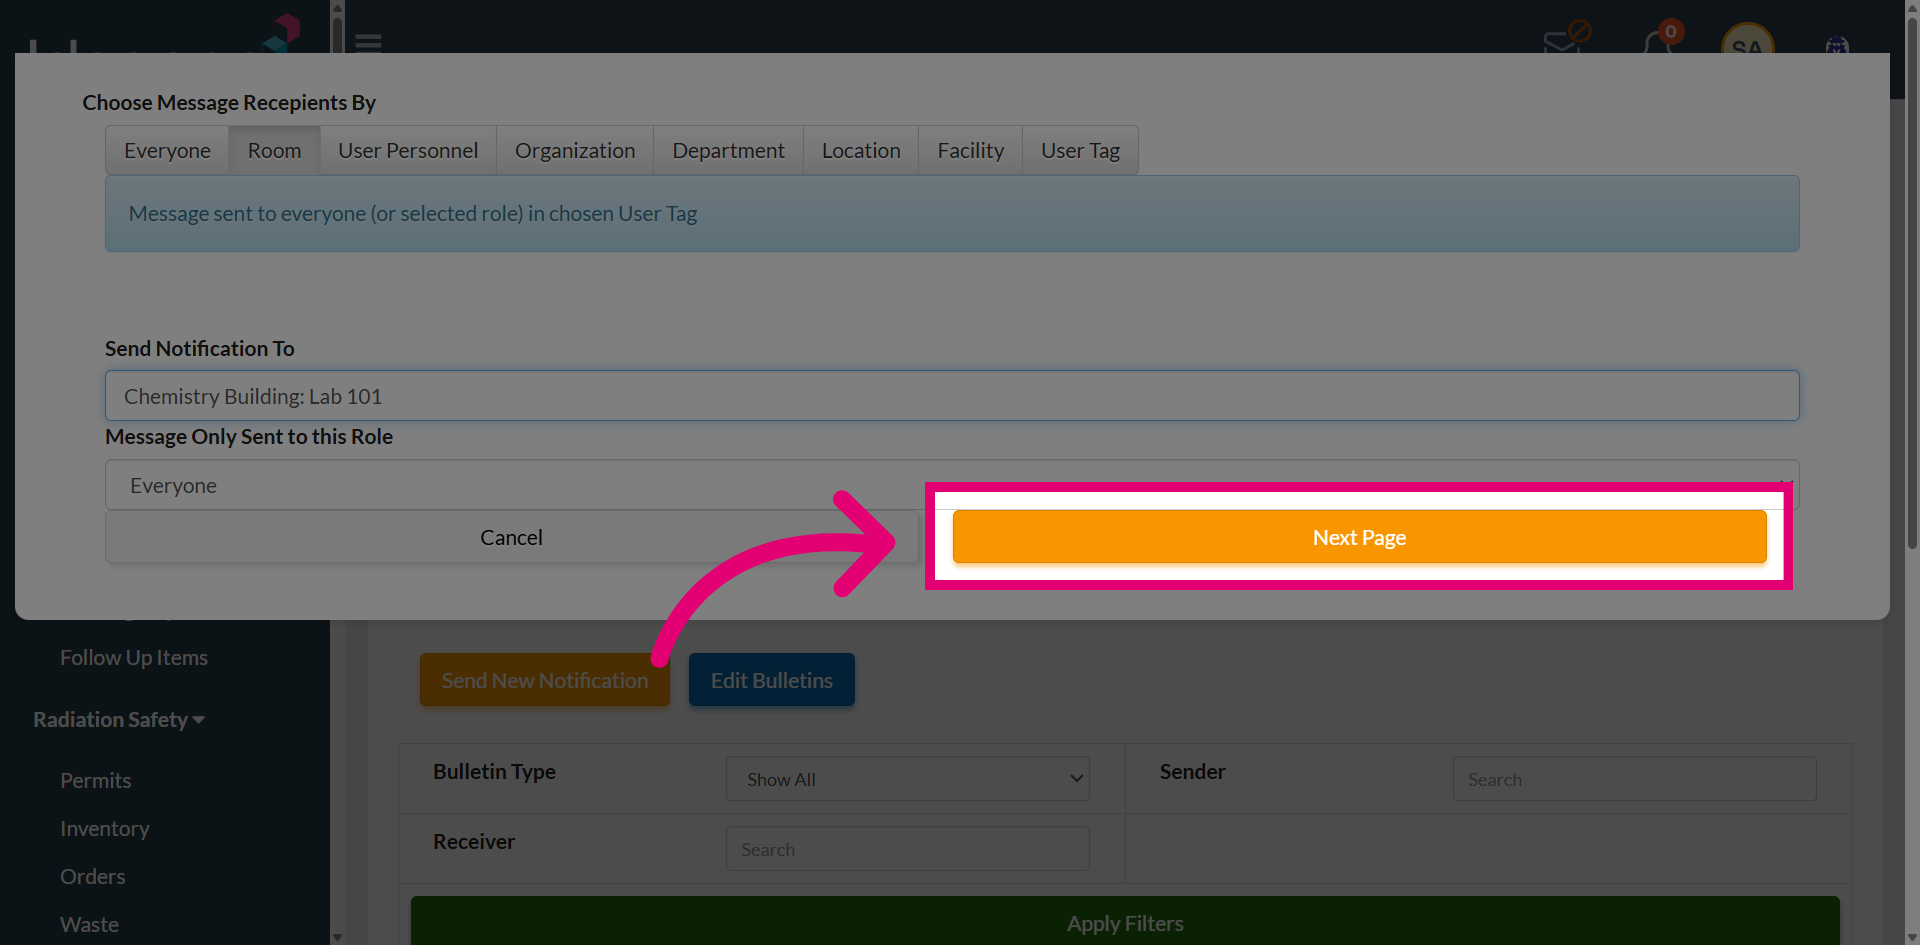
The Recipient Selection page will open, displaying various options that help you choose the appropriate audience for sending the bulletin.
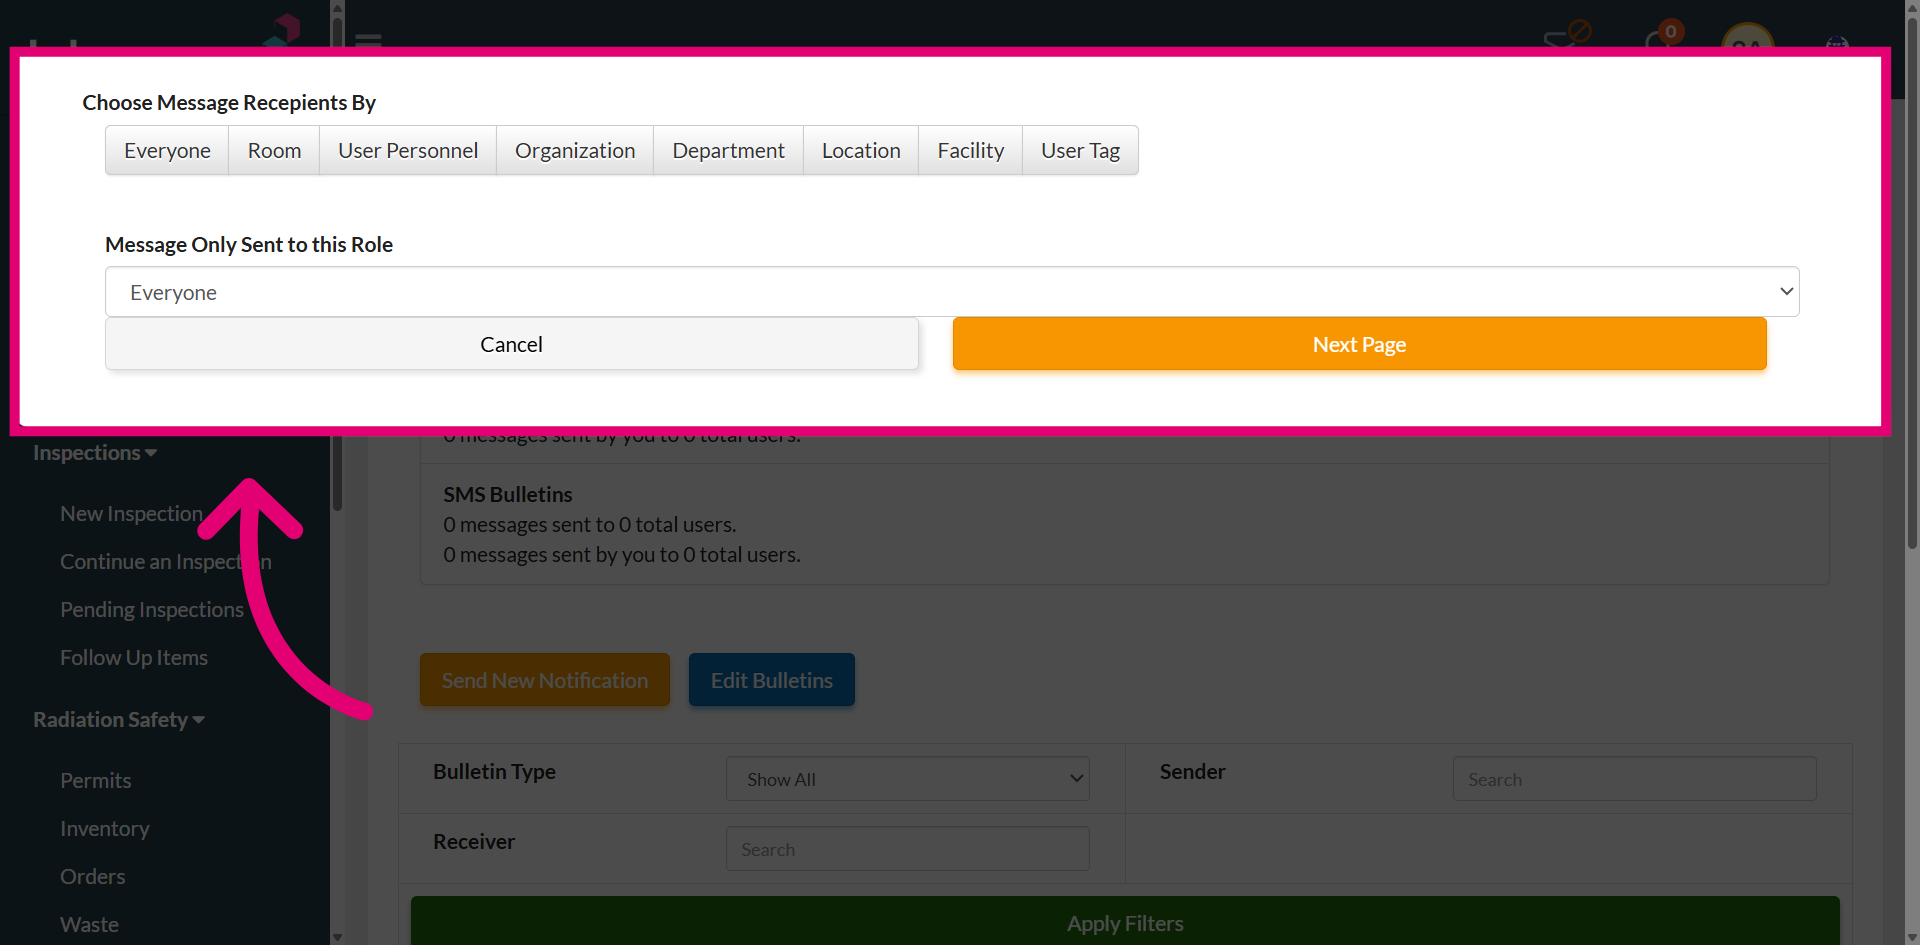
Select Everyone to send the bulletin to all users. In the next option, choose the appropriate recipient group or role, allowing you to target the intended audience.
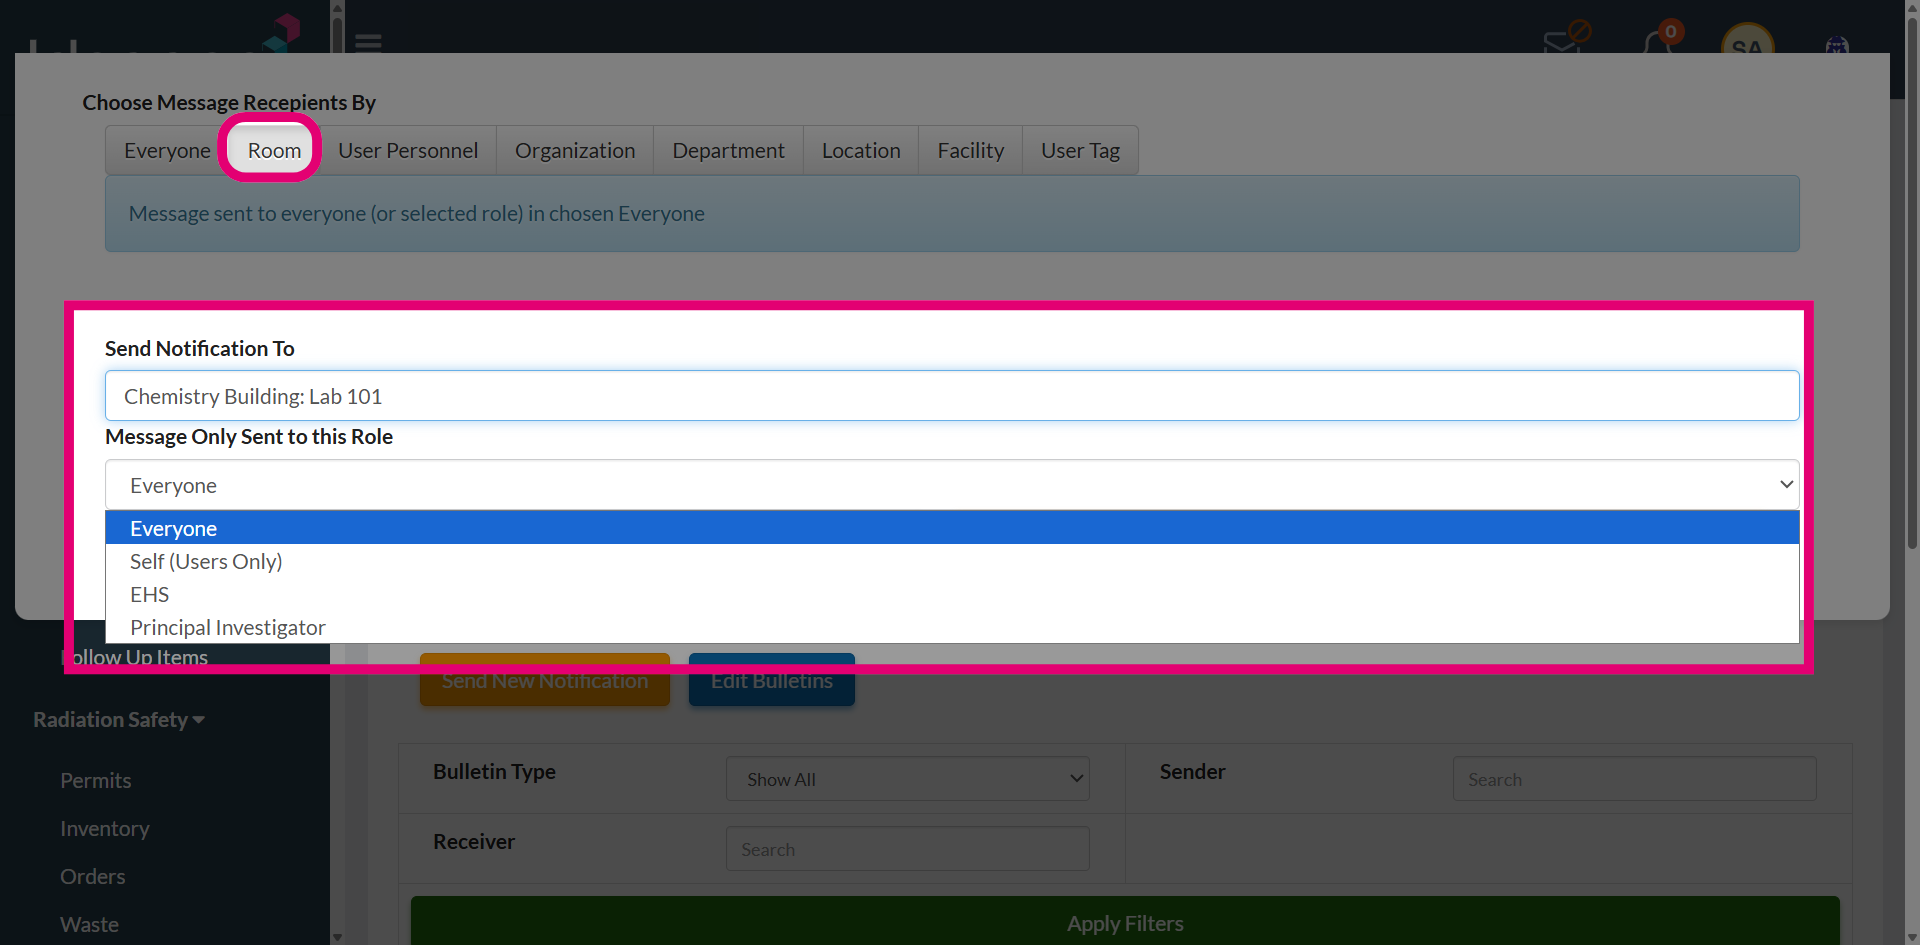
To send an in-app bulletin for a specific room, search for the room and select it from the dropdown menu. Then choose the appropriate recipient role to ensure the bulletin is sent to the intended audience.
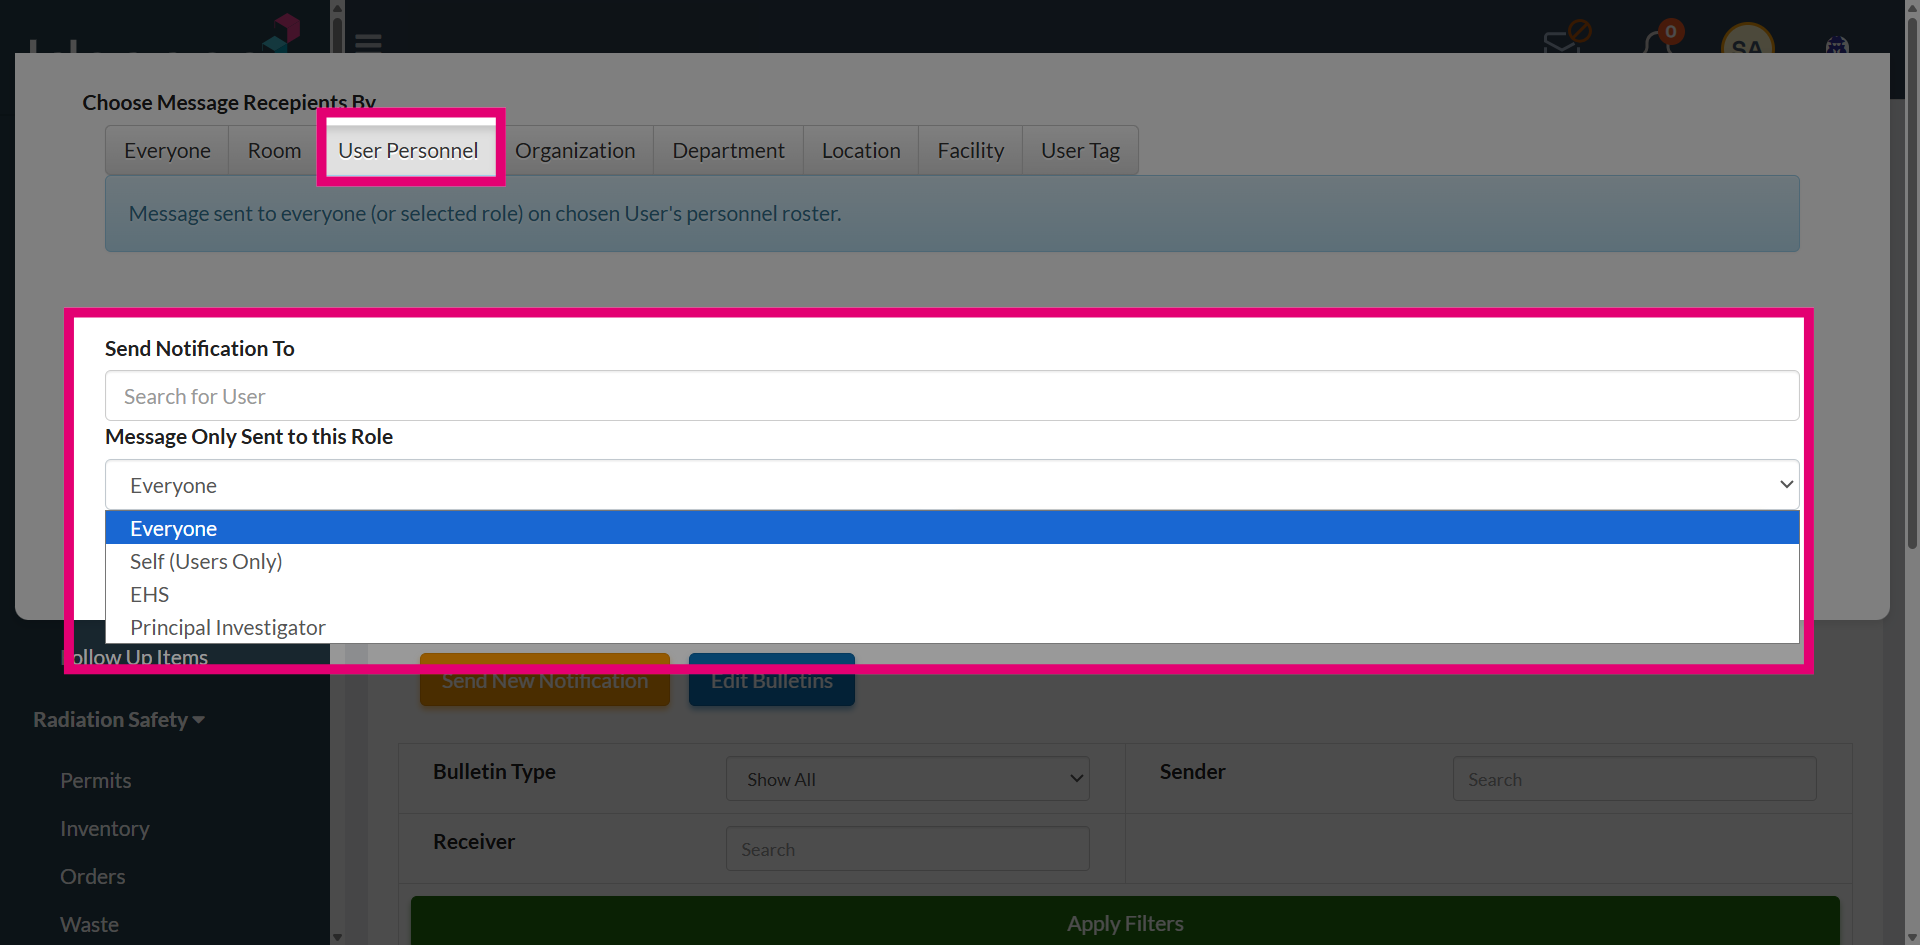
To send an in-app bulletin for a specific User Personnel, search for the user and select the appropriate user from the dropdown list. The bulletin will then be sent to Everyone or to the selected role, based on the chosen user's personal roster.
Similarly, notifications can also be sent based on organization, department, location, facility, or user tags. Select the desired locations or groups, and the message will be delivered to everyone within the selected organizations or to users with specific roles.
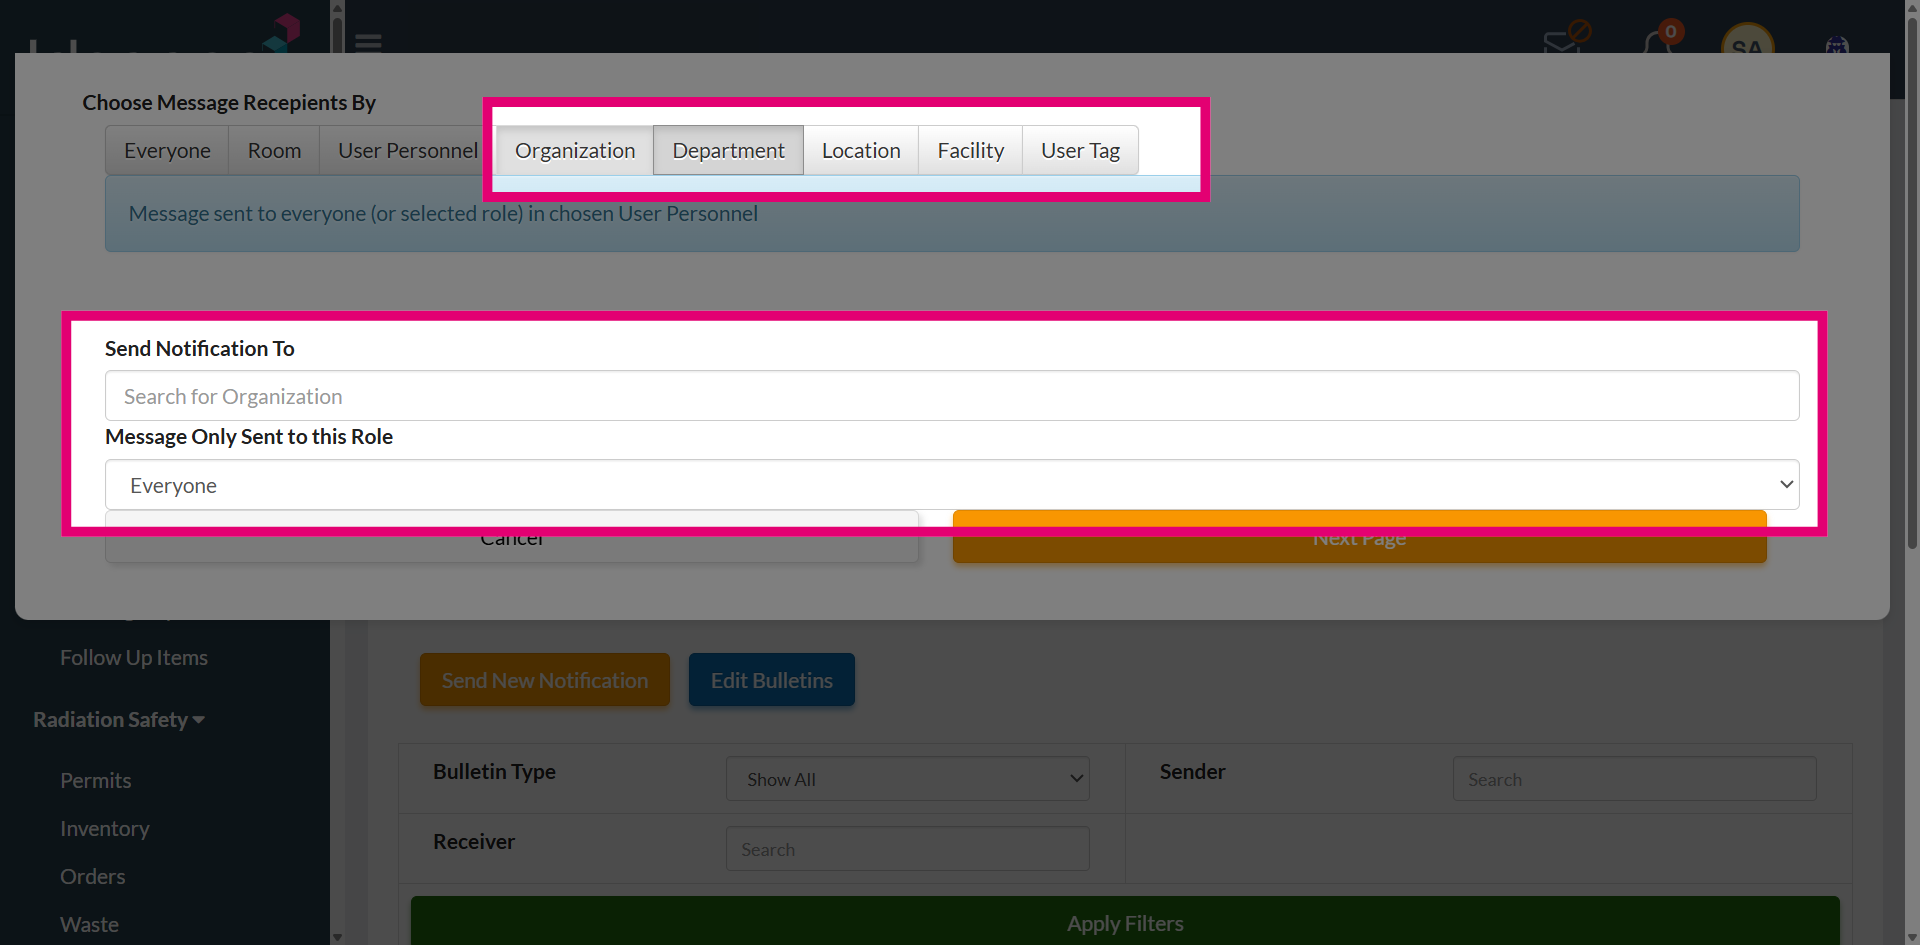
After selecting the desired recipients, proceed by selecting Next Page to continue.
Review the notification details to confirm the selected users, locations, and recipient roles, along with the message text.
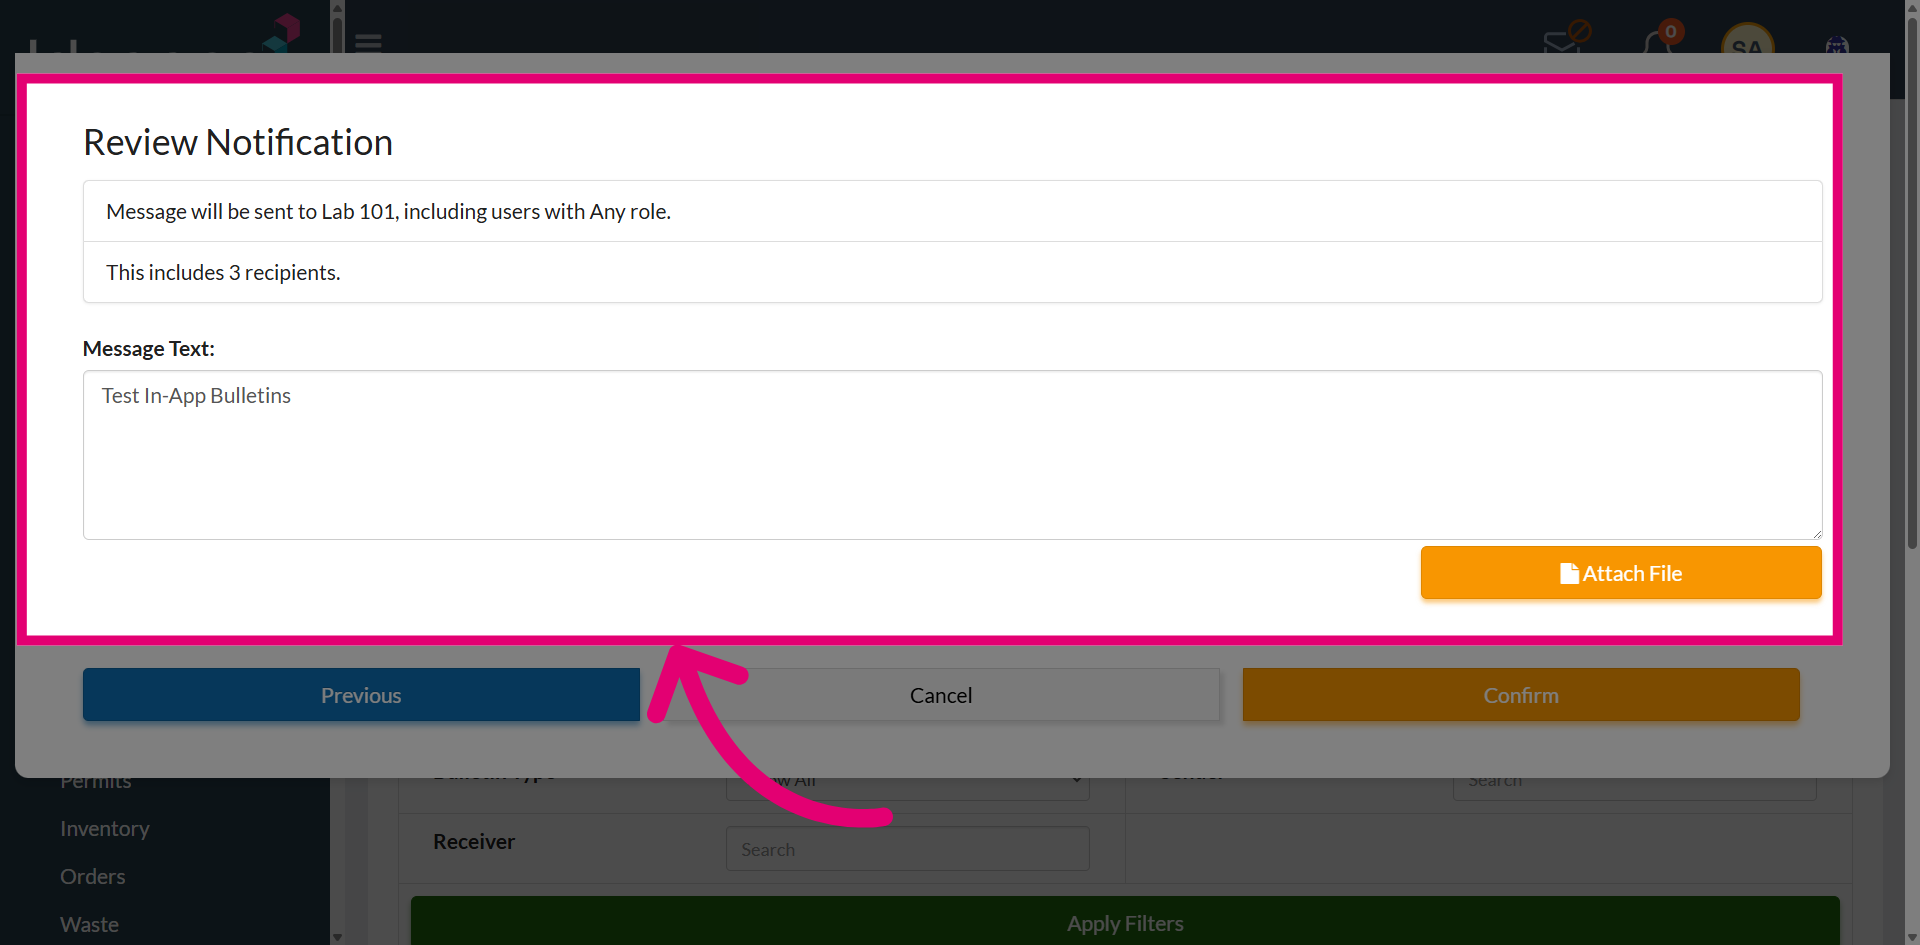
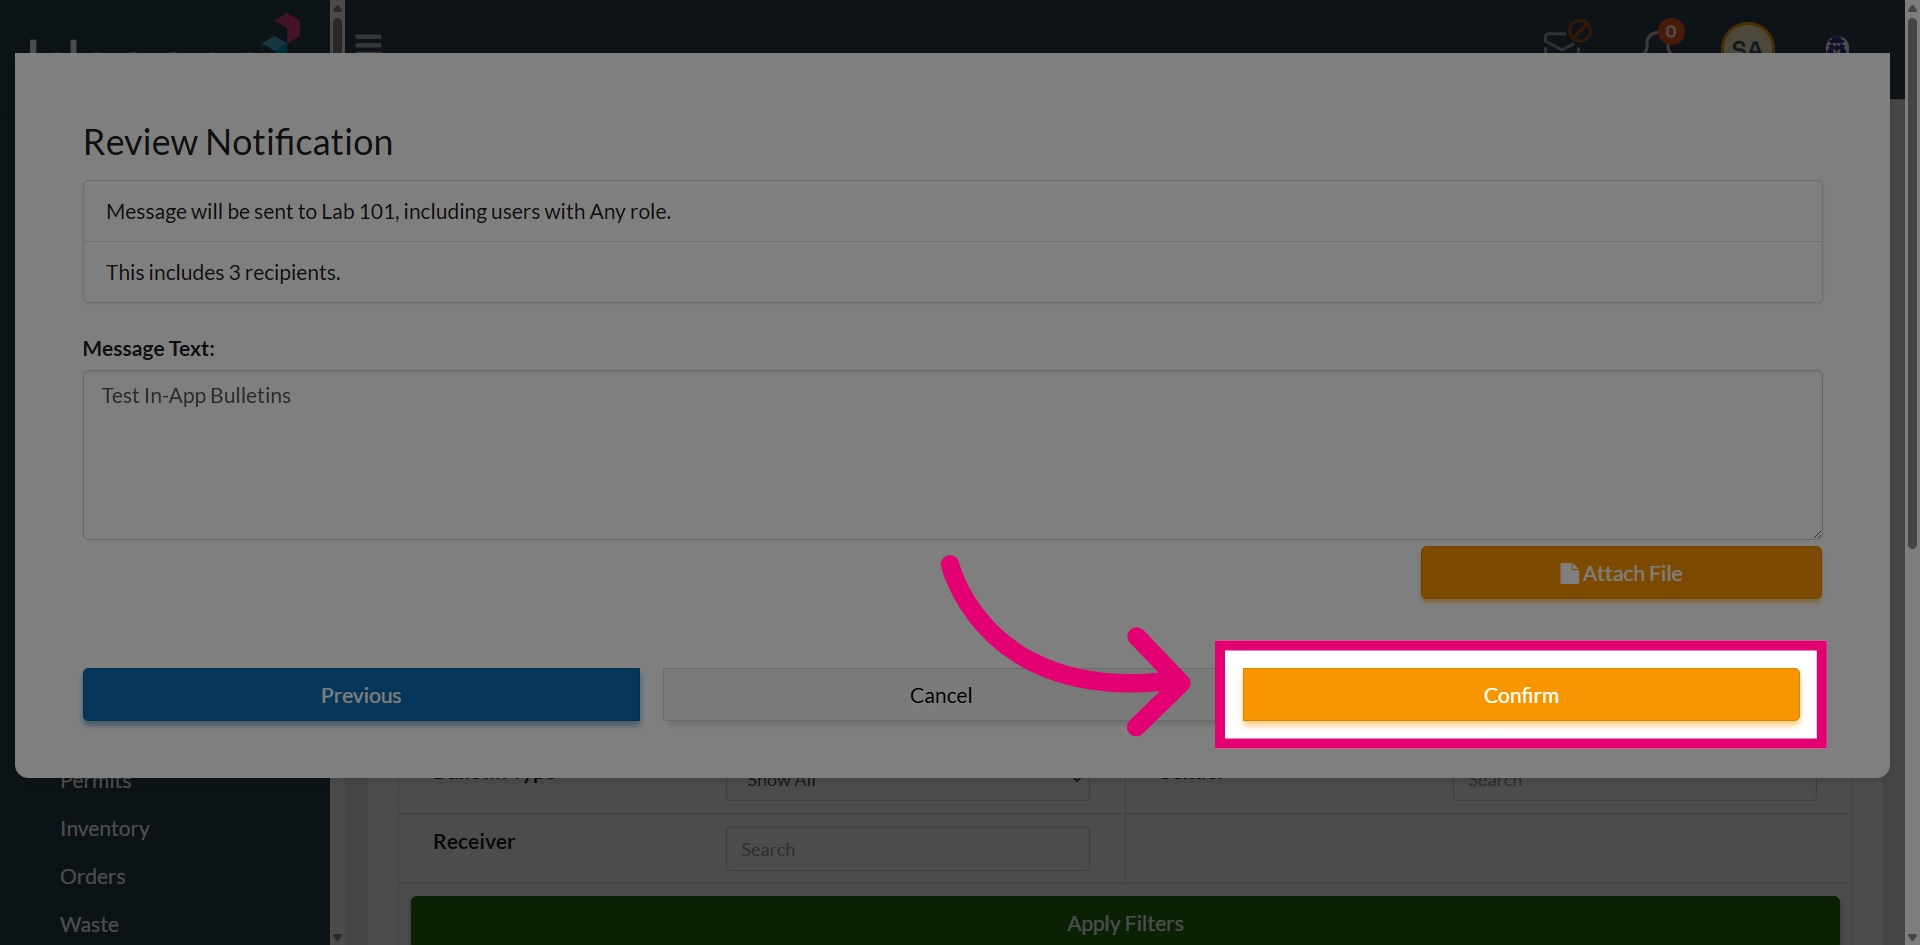
If everything appears correct, proceed by selecting Confirm to send the notification.
A confirmation message will appear asking whether you would like to proceed with sending the bulletin. You may either select Send Message to deliver the bulletin or select Cancel to return to the previous page using the Previous option.
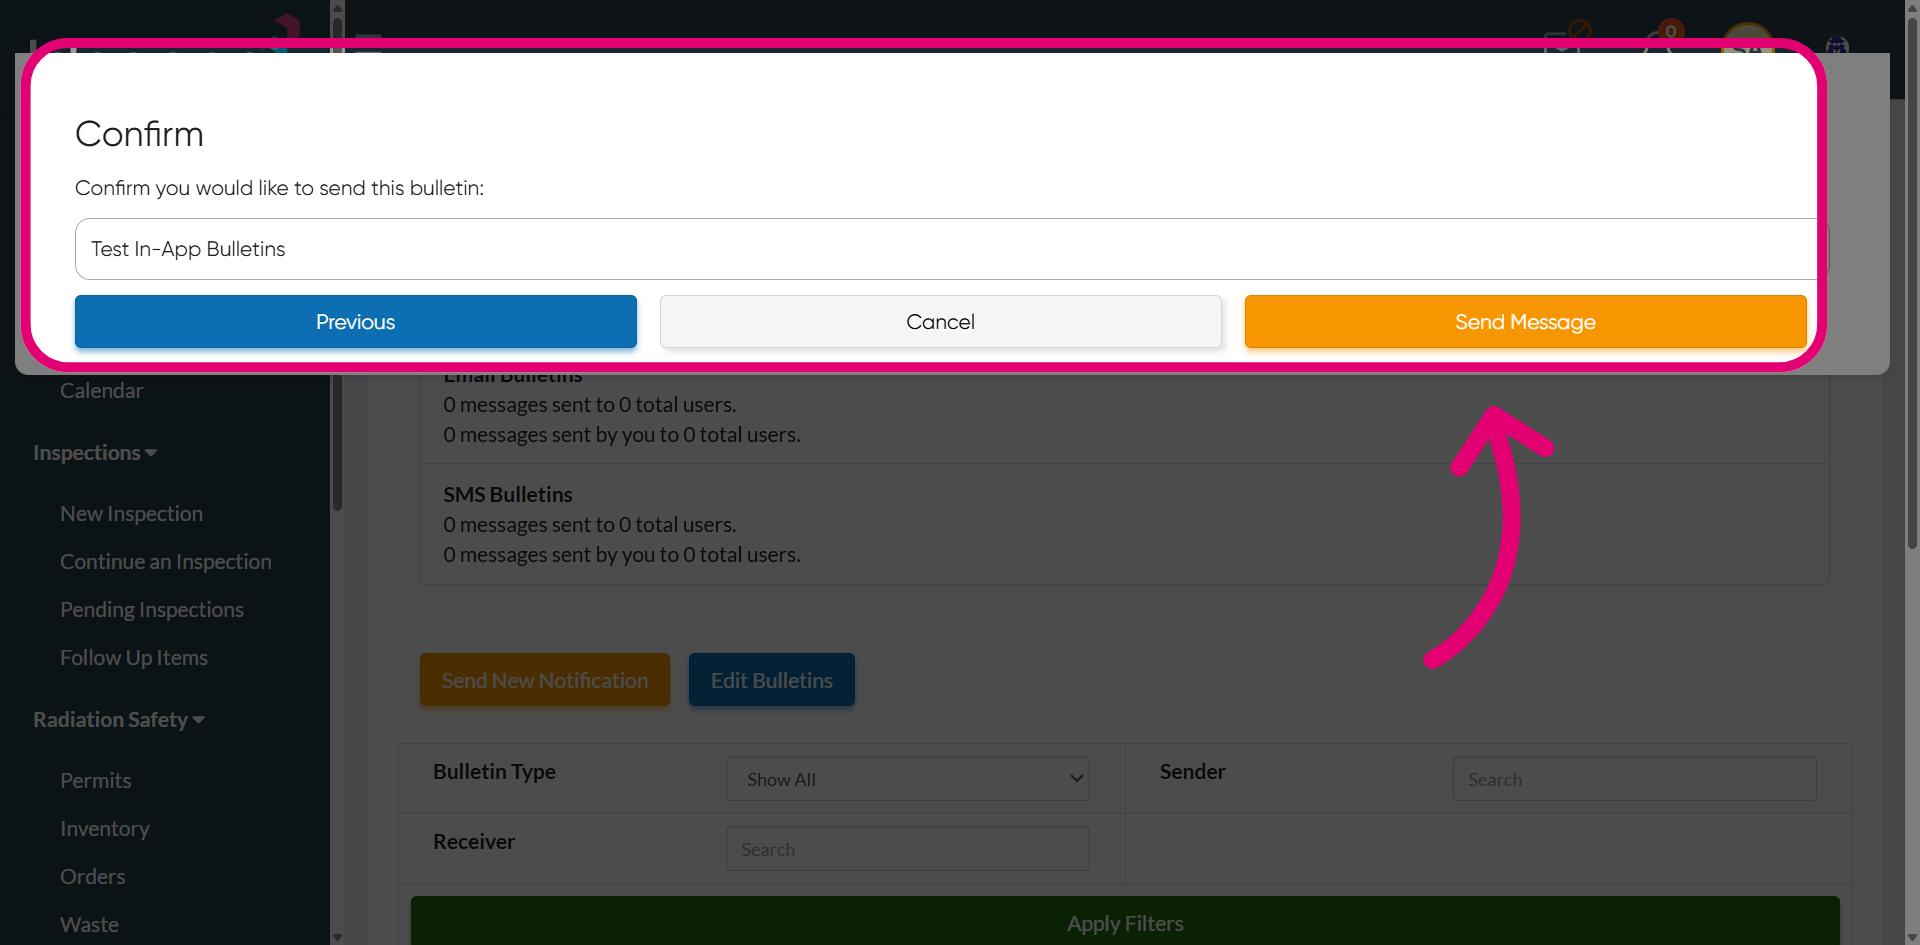
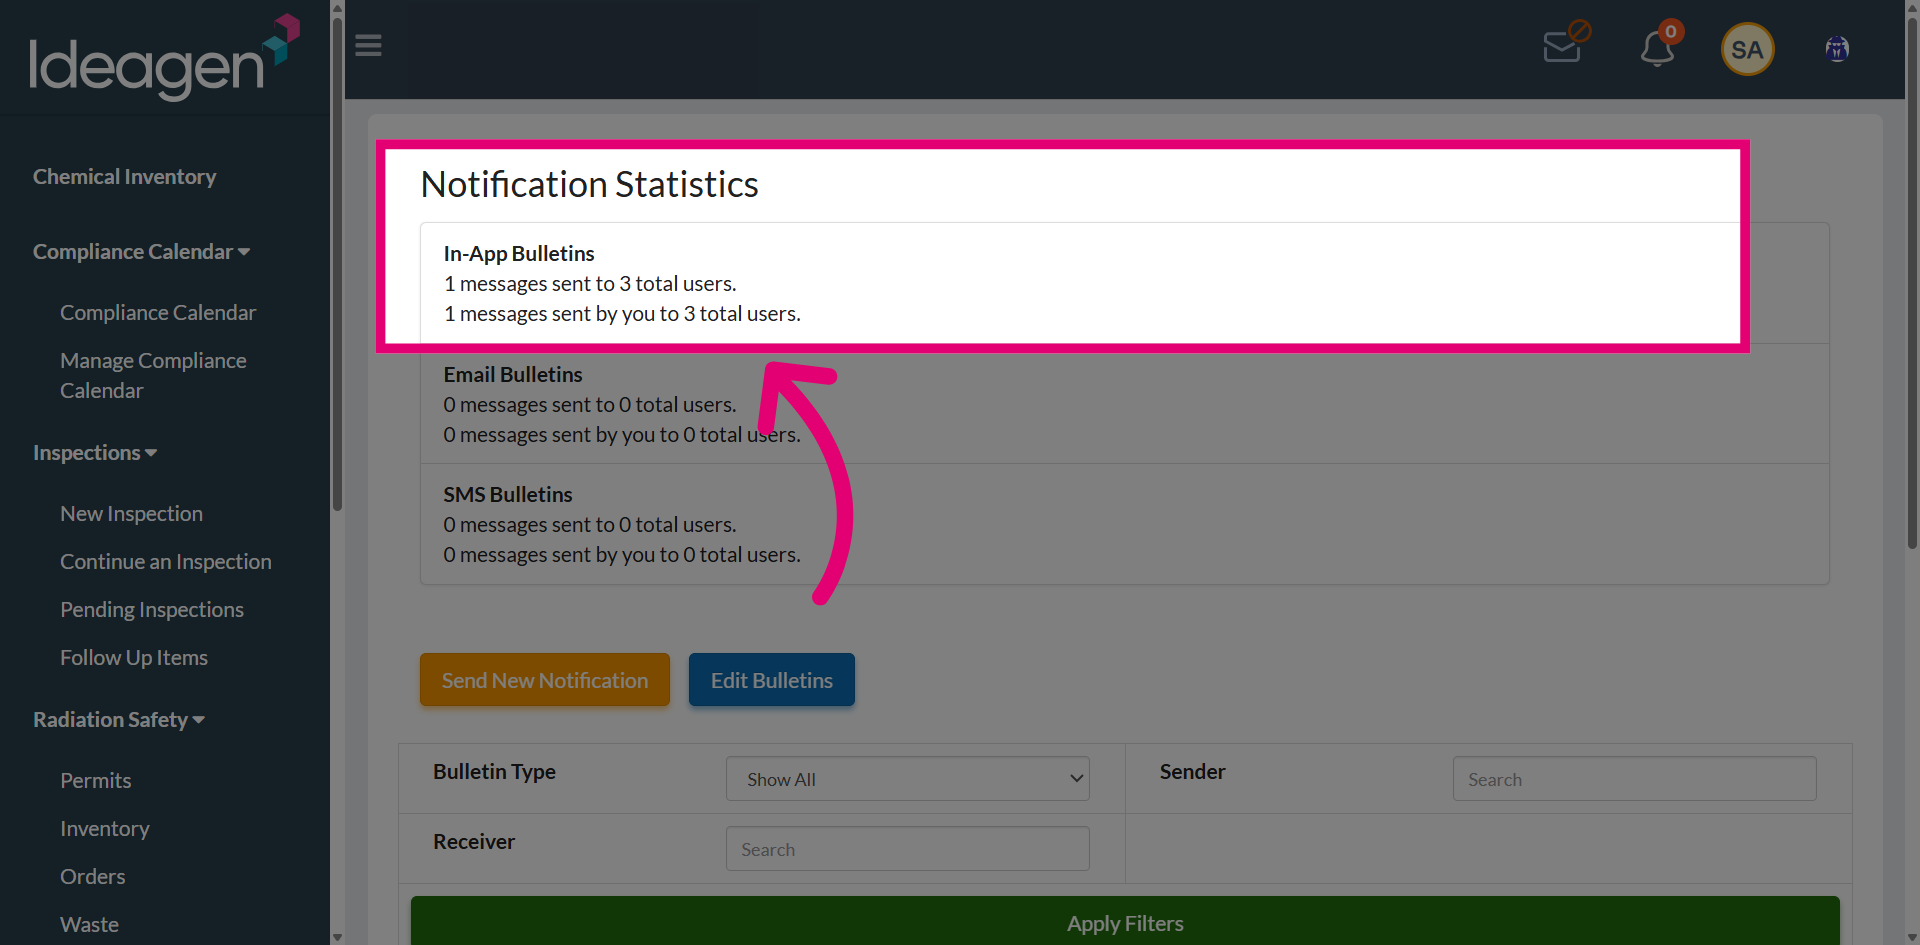
The in-app bulletin is now created, and the page will display statistics showing how many messages were sent and the number of users who received them.